How to test Gravitino
Gravitino has two types of tests:
- Unit tests, focus on the functionalities of the specific class, module, or component.
- Integration tests, end-to-end tests that cover the whole system.
- If you want to run the complete integration test suites, you need to install Docker in your environment.
- Refer to How to build Gravitino to make sure you have a build environment ready.
- You can use OrbStack to replace Docker Desktop on macOS. OrbStack automatically configures the network between the Docker containers.
- If you are using Docker Desktop for macOS, launch the
mac-docker-connector before running the tests.
Read
$GRAVITINO_HOME/dev/docker/tools/README.mdand$GRAVITINO_HOME/dev/docker/tools/mac-docker-connector.shfor more details.
Run the unit tests
To run the unit tests, run the following command:
./gradlew test -PskipITs
This command runs all the unit tests and skips the integration tests.
Run the integration tests
Gravitino has two modes to run the integration tests, the default embedded mode and deploy mode.
- In
embeddedmode, the integration test starts an embeddedMiniGravitinoserver within the same process as the integration test to run the integration tests. - In
deploymode, you have to build (./gradlew compileDistribution) a Gravitino binary package beforehand. The integration test launches and connects to the local Gravitino server to run the integration tests.
Run the integration tests in embedded mode
-
Run the
./gradlew build -x testcommand to build the Gravitino project. -
Use the
./gradlew test [--rerun-tasks] -PskipTests -PtestMode=embeddedcommands to run the integration tests.
Running the ./gradlew build command triggers the build and runs the integration tests in embedded mode.
Deploy the Gravitino server and run the integration tests in deploy mode
To deploy the Gravitino server locally to run the integration tests, follow these steps:
- Run the
./gradlew build -x testcommand to build the Gravitino project. - Use the
./gradlew compileDistributioncommand to compile and package the Gravitino project in thedistributiondirectory. - Use the
./gradlew test [--rerun-tasks] -PskipTests -PtestMode=deploycommand to run the integration tests in thedistributiondirectory. - Use the
bash integration-test/trino-test-tools/trino_test.shcommand to run all the Trino test sets in theintegration-test/src/test/resources/trino-ci-testset/testsetsdirectory.
Skip tests
- Skip unit tests by using the
./gradlew build -PskipTestscommand. - Skip integration tests by using the
./gradlew build -PskipITscommand. - Skip web frontend integration tests by using the
./gradlew build -PskipWebITscommand. - Skip both unit tests and integration tests by using the
./gradlew build -x testor./gradlew build -PskipTests -PskipITscommands.
Configuring parameters for integration tests
DISPLAY_WEBPAGE_IN_TESTING
By default, the Gravitino web frontend page will not pop up when running integration tests.
If you wish to display the web frontend page during integrations test, you can set the DISPLAY_WEBPAGE_IN_TESTING environment variable in setIntegrationTestEnvironment in file build.gradle.kts.
For example:
param.environment("DISPLAY_WEBPAGE_IN_TESTING", true)
Docker test environment
Some integration test cases depend on the Gravitino CI Docker image.
If an integration test relies on the specific Gravitino CI Docker image,
set the @tag(gravitino-docker-it) annotation in the test class.
For example, the integration-test/src/test/.../CatalogHiveIT.java test needs to connect to
the datastrato/gravitino-ci-hive Docker container for testing the Hive data source.
Therefore, it should have the following @tag annotation:@tag(gravitino-docker-it). This annotation
helps identify the specific Docker container required for the integration test.
For example:
@Tag("gravitino-docker-it")
public class CatalogHiveIT extends AbstractIT {
...
}
Running all the integration tests
- Make sure that the
Docker serveris running before running all the integration tests. Otherwise, it only runs the integration tests without thegravitino-docker-ittag. - On macOS, be sure to run the
${GRAVITINO_HOME}/dev/docker/tools/mac-docker-connector.shscript before running the integration tests; or make sure that OrbStack is running.
When integration tests run, they check the whole environment and output the status of the required environment, for example:
------------------ Check Docker environment ---------------------
Docker server status ............................................ [running]
mac-docker-connector status ..................................... [stop]
OrbStack status ................................................. [yes]
Using Gravitino IT Docker container to run all integration tests. [deploy test]
-----------------------------------------------------------------
Complete integration tests only run when all the required environments are met. Otherwise,
only parts of them without the gravitino-docker-it tag run.
How to debug Gravitino server and integration tests in embedded mode
By default, the integration tests run in the embedded mode, in which MiniGravitino starts in the
same process. Debugging MiniGravitino is simple and easy, you can modify any code in the
Gravitino project and set breakpoints anywhere.
How to debug Gravitino server and integration tests in deploy mode
This mode is closer to the actual environment, but more complex to debug. To debug the Gravitino server code, follow these steps:
- Run the
./gradlew build -x testcommand to build the Gravitino project. - Use the
./gradlew compileDistributioncommand to republish the packaged project in thedistributiondirectory. - If you are only debugging integration test codes, You don't have to do any setup to debug directly.
- If you need to debug Gravitino server codes, follow these steps:
- Enable the
GRAVITINO_DEBUG_OPTSenvironment variable in thedistribution/package/conf/gravitino-env.shfile to enable remote JVM debugging. - Manually start the Gravitino server using the
./distribution/package/bin/gravitino.sh startcommand. - Select the
gravitino.server.mainmodule classpath in theRemote JVM Debugto attach the Gravitino server process and debug it.
- Enable the
Running on GitHub actions
- GitHub Actions automatically run integration tests in the embedded and deploy modes when you submit a pull request.
- View the test results in the
Actionstab of the pull request page. - Run the integration tests in several steps:
- The Gravitino integration tests pull the CI Docker image from the Docker Hub repository. This step typically takes around 15 seconds.
- If you set the
debug actionlabel in the pull request, GitHub actions runs an SSH server withcsexton/debugger-action@master, allowing you to log into the GitHub actions environment for remote debugging. - The Gravitino project compiles and packages in the
distributiondirectory using the./gradlew compileDistributioncommand. - Run the
./gradlew test -PtestMode=[embedded|deploy]command.
Test failure and test log
If a test fails, you can retrieve valuable information from the logs and test reports. Test reports are in the ./build/reports directory. The integration test logs are in the ./integrate-test/build directory. In deploy mode, Gravitino server logs are in the ./distribution/package/logs/ directory.
In the event of a test failure within the GitHub workflow, the system generates archived logs and test reports. To obtain the archive, follow these steps:
-
Click the
detaillink associated with the failed integration test in the pull request. This redirects you to the job page.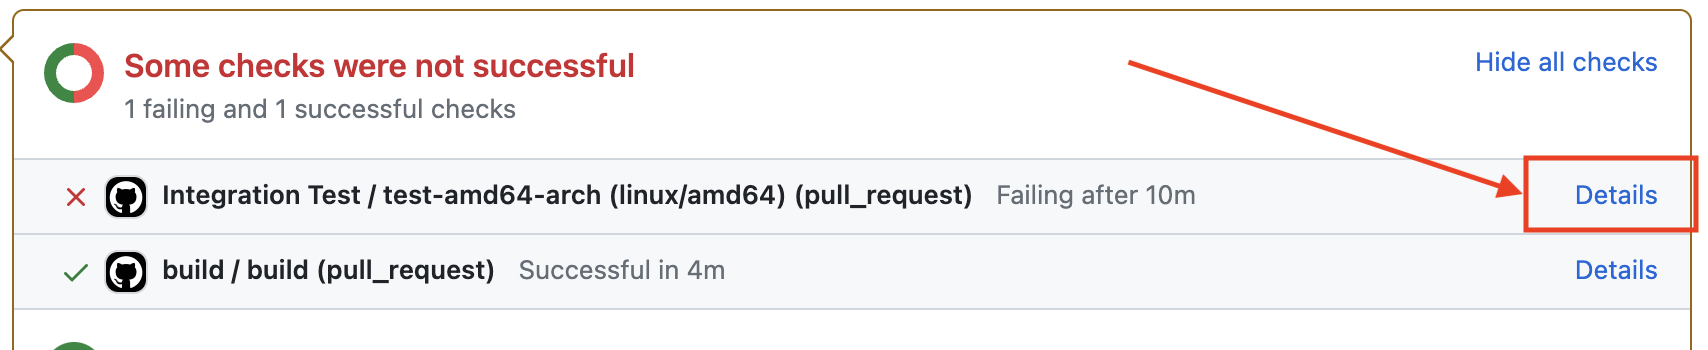
-
On the job page, locate the
Summarybutton on the left-hand side and click it to access the workflow summary page.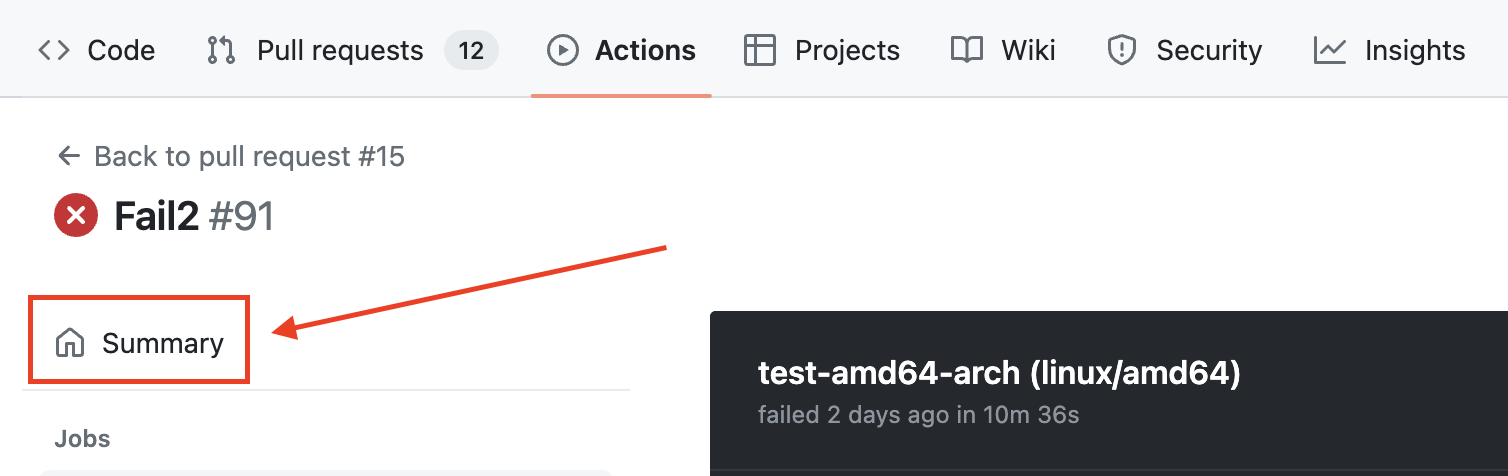
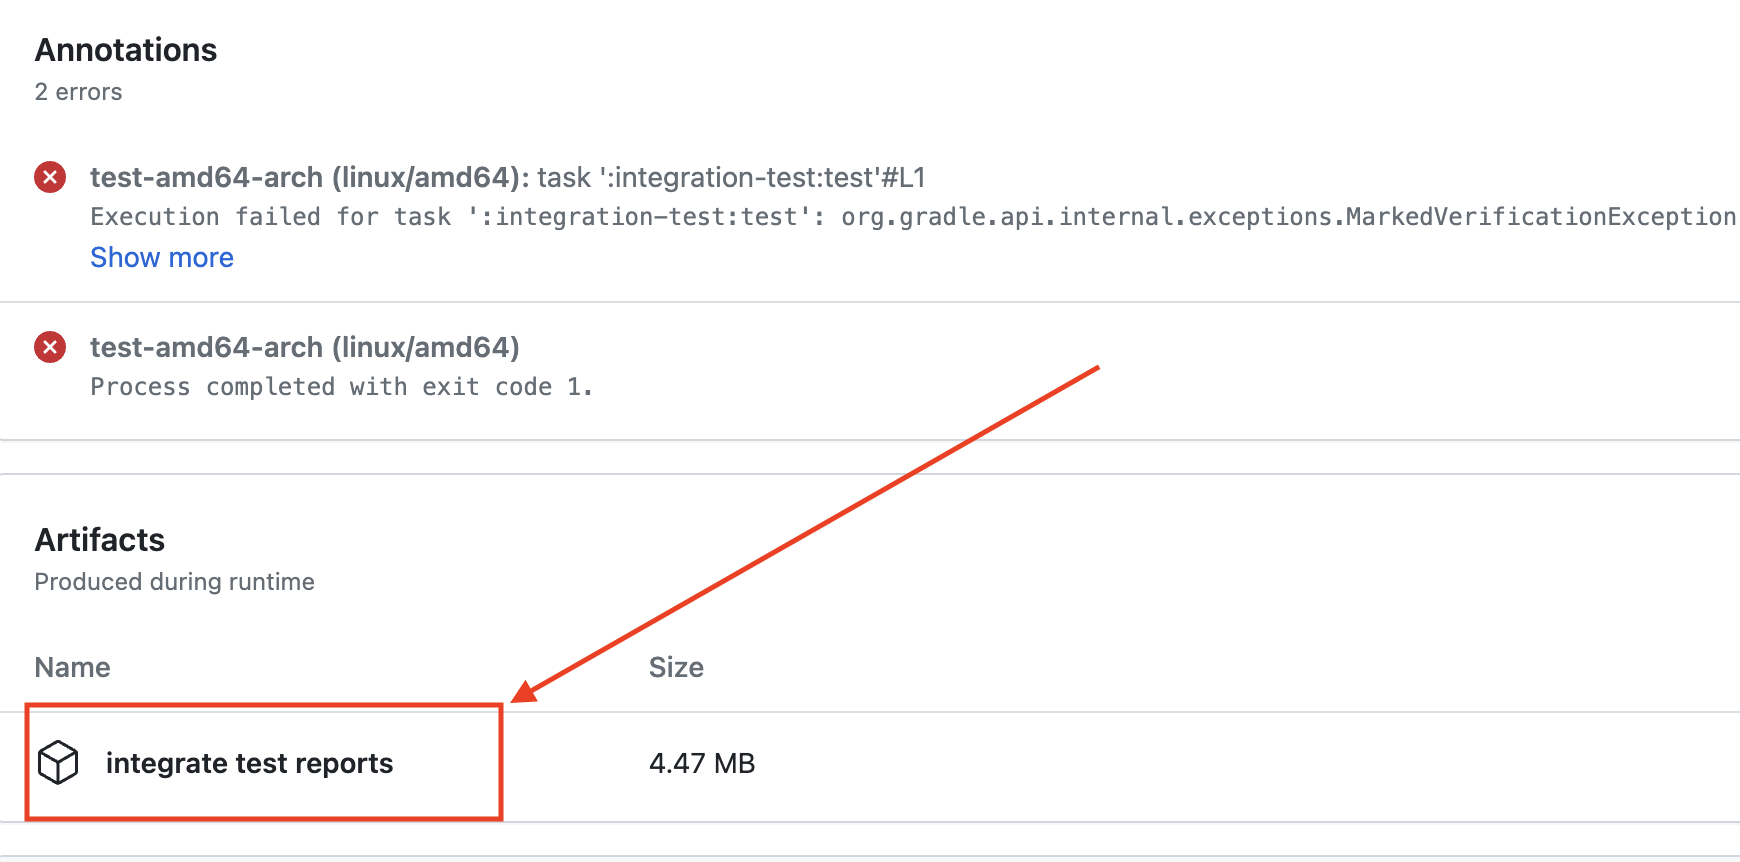
-
Look for the Artifacts item on the summary page and download the archive from there.
-
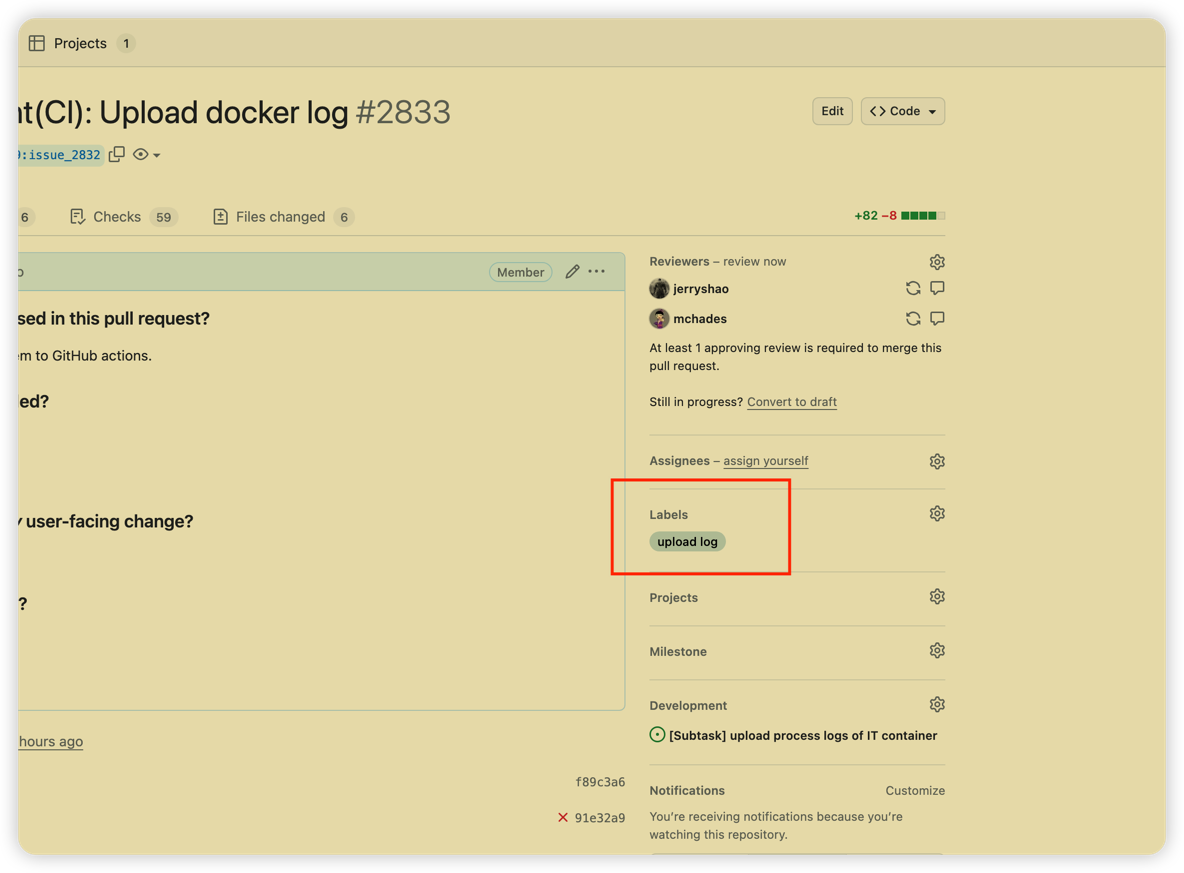
You can also add the tag
upload logto your PR to upload the logs to the PR page. in this case, no matter the CI pipeline status, the logs will be uploaded to the PR page.