Authentication
Introduction
Authentication decides who a caller is. Datastrato Enterprise offers two mechanisms: Basic, which
verifies a user name and password against local accounts the server itself holds, and OAuth, which
validates a JWT issued by your identity provider. Both can run at once, and most production
deployments do exactly that: OAuth for people and engines, Basic kept alongside it so the local
admin account remains a way in when the identity provider is unavailable.
Every server-side setting on this page goes in my-values.yaml and takes effect when you rerun the
install command from Install with Helm. Nothing here needs a configuration file on
the server, an environment variable, or a restart of your own.
The chart refuses to render when gravitino.authenticators contains simple, which performs no
authentication and accepts any user name without a password.
Basic mode
In Basic mode the server verifies HTTP Basic credentials against local accounts held in its relational entity store.
gravitino:
  authenticators: "basic"
  authorization:
    serviceAdmins: admin
  admin:
    username: admin
    password: "{admin_password}"
Two things the chart does for you when basic is listed, so they are not steps to carry out. The
local-account REST endpoints are registered automatically: the chart appends
org.apache.gravitino.idp.web.rest.feature to the server's REST extension packages. The initial
administrator password is delivered automatically: the chart puts gravitino.admin.username and
gravitino.admin.password in a Secret named {release}-gravitino-admin-credentials and hands the
password to the server, generating a 24-character random password when you leave
gravitino.admin.password empty.
kubectl -n "$NAMESPACE" get secret "$RELEASE-gravitino-admin-credentials" \
  -o jsonpath='{.data.password}' | base64 -d
To keep the password out of the values file altogether, create that Secret yourself with username
and password keys and name it in gravitino.admin.existingSecret. The chart carries a
helm.sh/resource-policy: keep annotation on the Secret it creates and reuses an existing one of the
same name, so the password survives upgrades and uninstalls either way.
Passwords must be 12 to 64 characters. For creating further local users and groups, see Directory.
For the client side, enable Basic mode:
GravitinoClient client = GravitinoClient.builder(uri)
    .withMetalake("metalake")
    .withBasicAuth("admin", "YourSecureGravitinoPassword")
    .build();
from gravitino.auth.basic_auth_provider import BasicAuthProvider
from gravitino.client.gravitino_client import GravitinoClient

client = GravitinoClient(
    uri="http://localhost:8090",
    metalake_name="metalake",
    auth_data_provider=BasicAuthProvider("admin", "YourSecureGravitinoPassword"),
)
curl -v -X GET \
  -H "Accept: application/vnd.gravitino.v1+json" \
  -H "Content-Type: application/json" \
  -H "Authorization: Basic $(echo -n 'admin:YourSecureGravitinoPassword' | base64)" \
  http://localhost:8090/api/version
The UI uses the first entry in gravitino.authenticators from /configs. When it is basic, the
sign-in page offers a user name and password form backed by local accounts. See
Directory.
OAuth mode
Gravitino supports external OAuth servers with two token validation methods:
Static signing key validation uses a pre-configured signing key to validate JWT tokens.
JWKS-based validation fetches public keys from the provider's JWKS endpoint as needed, and covers OIDC providers such as Azure AD along with other JWKS-compatible providers.
The values below enable OAuth. gravitino.authenticator.oauth.serviceAudience is the one required
key: the chart refuses to render without it whenever oauth is listed.
gravitino:
  authenticators: "oauth,basic"
  authenticator:
    oauth:
      serviceAudience: "{audience}"
      tokenValidatorClass: "org.apache.gravitino.server.authentication.JwksTokenValidator"
      jwksUri: "https://{oauth_host}/.well-known/jwks.json"
      principalFields: "preferred_username,email,sub"
Listing basic after oauth keeps the local admin account usable for recovery. The first
authenticator listed is the one the UI presents, and a request accepted by more than one
authenticator uses the first that claims it.
For static key validation, set defaultSignKey, serverUri, and tokenPath instead of
jwksUri, with tokenValidatorClass set to
org.apache.gravitino.server.authentication.StaticSignKeyValidator.
For JWKS validation, set jwksUri and tokenValidatorClass to
org.apache.gravitino.server.authentication.JwksTokenValidator. With JWKS validation the static-key
settings are unnecessary, since the validator fetches public keys from the provider.
A request from a client or engine carrying a token follows this path:
The server fetches keys only as needed, so steps 4 and 5 do not repeat on every request. Static signing key validation skips them entirely.
Where the JWKS endpoint presents a certificate from a private certificate authority, import the CA so the server can reach it:
gravitino:
  ssl:
    trustStore:
      enabled: true
      existingSecret: "{ca_secret}"
For the client side, enable OAuth mode:
DefaultOAuth2TokenProvider authDataProvider = DefaultOAuth2TokenProvider.builder()
    .withUri("oauth server uri")
    .withCredential("yy:xx")
    .withPath("oauth/token")
    .withScope("test")
    .build();

GravitinoClient client = GravitinoClient.builder(uri)
    .withMetalake("metalake")
    .withOAuth(authDataProvider)
    .build();
Browser sign-in for the UI
Signing in to the UI through your identity provider is configured separately from token validation,
under gravitino.browserSso. Set issuer, clientId, and clientSecret together; the chart
refuses to render when only some of the three are present.
gravitino:
  browserSso:
    issuer: "https://{oauth_host}/realms/{realm}"
    clientId: "{client_id}"
    clientSecret: "{client_secret}"
    name: "Keycloak"
    scope: "openid profile email"
With all three set, the chart passes the issuer, client ID, and client secret to the UI, adds the
optional name and scope as the label and scope of the sign-in button, and publishes
gravitino.datastrato.custom.oidc.enable on the unauthenticated /configs endpoint so the UI can
offer the button before anyone has signed in. Leave the block unset when OAuth is only for API token
validation.
Sign-in follows the Authorization Code flow with PKCE:
The callback the identity provider redirects to is derived from the UI address published through the
ingress, so publish the UI on the hostname your provider knows. The UI must be reached over HTTPS or
from localhost.
Browser sign-in uses the Authorization Code flow with PKCE, which depends on the browser
Web Crypto API. Browsers only
expose that API in a secure context,
meaning HTTPS or localhost. Over plain HTTP on any other host, sign-in fails because the crypto
primitives PKCE needs are unavailable. The server itself speaks plain HTTP inside the cluster and TLS
terminates at the ingress, so serving the UI over HTTPS is a matter of the ingress TLS settings in
Install with Helm.
Kerberos mode
Kerberos is not configurable through the Helm chart in this release: the chart renders no Kerberos authenticator settings and mounts no keytab.
Custom mode
Gravitino also supports custom authentication implementations. For the server side, implement the
Authenticator interface. For the client side, extend the abstract class CustomTokenProvider and
specify the token provider.
GravitinoClient client = GravitinoClient.builder(uri)
    .withMetalake("metalake")
    .withCustomProvider(provider)
    .build();
Naming a custom authenticator class is not among the values the chart renders, so a custom server-side authenticator cannot be selected through the chart in this release.
Principal mapping
Gravitino supports principal mapping to transform an authenticated principal into a user identity for authorization. The default is regex-based mapping.
Group mapping
Gravitino supports group mapping to transform authenticated groups into Gravitino groups for authorization. The default is regex-based mapping.
OAuth group mapping
Groups are extracted from the JWT claims named by gravitino.authenticator.oauth.groupsFields.
Customize how those groups are mapped:
gravitino:
  authenticator:
    oauth:
      # Default regex mapper, passes the claim through unchanged
      groupMapper: "regex"
      groupMapperRegexPattern: "^(.*)$"
To extract a group from a more complex string, for example /group to group, keep the regex
mapper and change the pattern to ^/(.*). To use a custom implementation, set groupMapper to its
fully qualified class name, such as com.example.MyCustomGroupMapper.
Note that groupMapperRegexPattern is the values key; the server property it renders is
gravitino.authenticator.oauth.groupMapper.regex.pattern.
Custom group mapper
For advanced use cases, implement the GroupMapper interface:
package com.example;

import org.apache.gravitino.UserGroup;
import org.apache.gravitino.auth.GroupMapper;
import java.util.Collections;
import java.util.List;
import java.util.Optional;
import java.util.stream.Collectors;

public class MyCustomGroupMapper implements GroupMapper {
  @Override
  public List<UserGroup> map(List<Object> groups) {
    if (groups == null) {
      return Collections.emptyList();
    }
    return groups.stream()
        .map(g -> new UserGroup(Optional.empty(), "mapped_" + g.toString()))
        .collect(Collectors.toList());
  }
}
Point the server at the class, which must be on the server classpath:
gravitino:
  authenticator:
    oauth:
      groupMapper: "com.example.MyCustomGroupMapper"
OAuth principal mapping
Principals are extracted from the JWT claims named by
gravitino.authenticator.oauth.principalFields. Customize how those principals are mapped:
gravitino:
  authenticator:
    oauth:
      # Default regex mapper, passes the claim through unchanged
      principalMapper: "regex"
      principalMapperRegexPattern: "^(.*)$"
To take the user name out of an email address, for example user@example.com to user, keep the
regex mapper and change the pattern to ([^@]+)@.*. To use a custom implementation, set
principalMapper to its fully qualified class name.
principalFields accepts a comma-separated list and each field is tried in order, so
preferred_username,email,sub uses the first of the three the token carries.
Custom principal mapper
For advanced use cases, implement the PrincipalMapper interface:
package com.example;

import org.apache.gravitino.auth.PrincipalMapper;
import java.security.Principal;

public class MyCustomPrincipalMapper implements PrincipalMapper {
  @Override
  public Principal map(String principal) {
    return () -> "mapped_" + principal;
  }
}
Point the server at the class, which must be on the server classpath:
gravitino:
  authenticator:
    oauth:
      principalMapper: "com.example.MyCustomPrincipalMapper"
When SCIM provisioning is enabled, the chart sets principalMapper and clears groupsFields itself,
and what you set for those two keys is ignored. See SCIM provisioning.
Server configuration
Values under gravitino.authenticator.oauth are read only when gravitino.authenticators contains
oauth. Paths in the table are relative to gravitino. in my-values.yaml.
| Values key | Description | Default value | Required |
|---|---|---|---|
authenticators | Comma-separated authenticators to enable, from basic and oauth. The first entry is the one the UI presents. simple is refused | basic | No |
authorization.serviceAdmins | Comma-separated service administrator user names | admin | No |
admin.username | Initial service administrator user name, used when basic is enabled | admin | No |
admin.password | Initial administrator password, 12 to 64 characters. A random 24-character password is generated when empty | (none) | No |
admin.existingSecret | Name of a Secret holding username and password, used instead of the two keys above | (none) | No |
authenticator.oauth.serviceAudience | Audience the server expects in the aud claim | test | Yes when oauth is enabled |
authenticator.oauth.tokenValidatorClass | Validator implementation. org.apache.gravitino.server.authentication.JwksTokenValidator for JWKS, org.apache.gravitino.server.authentication.StaticSignKeyValidator for a static key | (none) | No |
authenticator.oauth.jwksUri | JWKS endpoint the server fetches public keys from | (none) | Yes with JwksTokenValidator |
authenticator.oauth.defaultSignKey | Signing key used to validate JWTs | (none) | Yes with StaticSignKeyValidator |
authenticator.oauth.serverUri | URI of the OAuth server | (none) | Yes with StaticSignKeyValidator |
authenticator.oauth.tokenPath | Token endpoint path on the OAuth server | (none) | Yes with StaticSignKeyValidator |
authenticator.oauth.provider | Provider type, default or oidc | (none) | No |
authenticator.oauth.clientId | OAuth client ID | (none) | No |
authenticator.oauth.authority | Issuer URL of the OIDC provider | (none) | No |
authenticator.oauth.scope | Space-separated scopes | (none) | No |
authenticator.oauth.principalFields | JWT claims to use as the principal identity, tried in order | preferred_username | No |
authenticator.oauth.principalMapper | regex, or a fully qualified class implementing org.apache.gravitino.auth.PrincipalMapper | regex | No |
authenticator.oauth.principalMapperRegexPattern | Pattern whose first capture group becomes the principal. Renders principalMapper.regex.pattern | ^(.*)$ | No |
authenticator.oauth.groupsFields | JWT claims to use as group membership, tried in order | groups | No |
authenticator.oauth.groupMapper | regex, or a fully qualified class implementing org.apache.gravitino.auth.GroupMapper | regex | No |
authenticator.oauth.groupMapperRegexPattern | Pattern whose first capture group becomes the group. Renders groupMapper.regex.pattern | ^(.*)$ | No |
browserSso.issuer | Issuer URL the UI signs in against | (none) | Yes for browser sign-in |
browserSso.clientId | Client ID of the public client registered for the UI | (none) | Yes for browser sign-in |
browserSso.clientSecret | Client secret for that client | (none) | Yes for browser sign-in |
browserSso.name | Label shown on the sign-in button | (none) | No |
browserSso.scope | Scopes requested at sign-in | (none) | No |
ssl.trustStore.enabled | Import custom certificate authorities so the server can reach an HTTPS JWKS endpoint | false | No |
ssl.trustStore.existingSecret | Secret holding the CA certificates to import | (none) | Yes when ssl.trustStore.enabled is set |
Example: basic authentication
Local accounts, with the admin password set explicitly.
gravitino:
  authenticators: "basic"
  authorization:
    serviceAdmins: admin
  admin:
    username: admin
    password: "{admin_password}"
Apply the values with the install command from Install with Helm, then confirm the account works:
curl -v -X GET \
  -H "Accept: application/vnd.gravitino.v1+json" \
  -H "Content-Type: application/json" \
  -H "Authorization: Basic $(echo -n 'admin:YourSecureGravitinoPassword' | base64)" \
  http://localhost:8090/api/version
The password is set once, at first install. Later installs leave an existing password alone, so
changing gravitino.admin.password afterwards does not reset it. Reset a password through the local
account endpoints instead, as Directory describes.
Example: Azure AD as OIDC provider with JWKS validation
Azure AD with JWKS-based token validation.
Prerequisites:
- Azure AD tenant with an application registration (Single-page application)
- Application configured with:
- Client ID (Application ID)
- Platform configuration: Single-page application (SPA)
- Redirect URI:
https://{gravitino_host}/ui/oauth/callback - Required API permissions/scopes (typically
openid,profile,email)
gravitino:
  authenticators: "oauth,basic"
  authenticator:
    oauth:
      provider: "oidc"
      clientId: "{azure_app_client_id}"
      authority: "https://login.microsoftonline.com/{tenant_id}/v2.0"
      scope: "openid profile email"
      jwksUri: "https://login.microsoftonline.com/{tenant_id}/discovery/v2.0/keys"
      tokenValidatorClass: "org.apache.gravitino.server.authentication.JwksTokenValidator"
      serviceAudience: "{azure_app_client_id_or_api_identifier}"
      principalFields: "preferred_username,email,sub"
  browserSso:
    issuer: "https://login.microsoftonline.com/{tenant_id}/v2.0"
    clientId: "{azure_app_client_id}"
    clientSecret: "{client_secret}"
    name: "Azure AD"
    scope: "openid profile email"
Usage:
- UI: opening the UI redirects to Azure AD for sign-in
- API Access: use Azure AD tokens in the
Authorization: Bearer {token}header
Azure AD v2.0 Endpoint (Recommended):
The authority must use the v2.0 endpoint (/v2.0 suffix) to match the v2.0 JWKS URI, so that
tokens issued during OIDC discovery carry the token format and issuer claim your JWKS configuration
expects.
Alternative: Azure AD v1.0 Endpoint: For legacy applications or organizational policies requiring v1.0 tokens, use:
gravitino:
  authenticator:
    oauth:
      authority: "https://sts.windows.net/{tenant_id}/"
      jwksUri: "https://login.microsoftonline.com/{tenant_id}/discovery/v2.0/keys"
Azure AD uses the same signing keys for both v1.0 and v2.0, so v2.0 JWKS can validate v1.0 tokens.
Important: Do NOT use https://login.microsoftonline.com/{tenant_id}/ (without /v2.0) as the
authority when using v2.0 JWKS. The result is an issuer mismatch: the token carries
iss: "https://sts.windows.net/..." while the server expects
iss: "https://login.microsoftonline.com/...".
Service Audience:
The serviceAudience should match the aud claim in your Azure AD tokens, which is typically the
application's client ID, though it can be a custom API identifier where custom API scopes are
configured, such as api://{client_id}.
Principal Fields:
The principalFields supports multiple fallback options. Each field is tried in order, for example
first preferred_username, then email, then sub, until one holds a non-null value to use as the
user identity.
With JWKS validation, defaultSignKey, serverUri, and tokenPath are unnecessary, since the
validator fetches public keys from the Azure AD JWKS endpoint.
Example: static key OAuth provider
For compatibility with existing OAuth servers that do not support JWKS:
gravitino:
  authenticators: "oauth,basic"
  authenticator:
    oauth:
      provider: "default"
      clientId: "test"
      scope: "test"
      serviceAudience: "test"
      tokenValidatorClass: "org.apache.gravitino.server.authentication.StaticSignKeyValidator"
      serverUri: "http://{oauth_host}"
      tokenPath: "/oauth2/token"
      defaultSignKey: "{static_signing_key}"
Example: JWKS validation with default provider
For JWKS-based token validation without browser sign-in:
gravitino:
  authenticators: "oauth,basic"
  authenticator:
    oauth:
      provider: "default"
      serviceAudience: "{audience}"
      tokenValidatorClass: "org.apache.gravitino.server.authentication.JwksTokenValidator"
      jwksUri: "https://{oauth_host}/.well-known/jwks.json"
Example
Setting up an OAuth mode server against a sample authorization server.
-
Prerequisite.
You need Docker, and a cluster with Datastrato Enterprise installed as Install with Helm describes.
-
Set up an external OAuth server.
There is a sample-authorization-server based on spring-authorization-server. The image has registered client information in the external OAuth server and its clientId is
test, secret istest, scope istest.Start the sample authorization serverdocker run -p 8177:8177 --name sample-auth-server -d datastrato/sample-authorization-server:0.3.0 -
Open the JWK URL of the Authorization server in the browser and you can get the JWK.

-
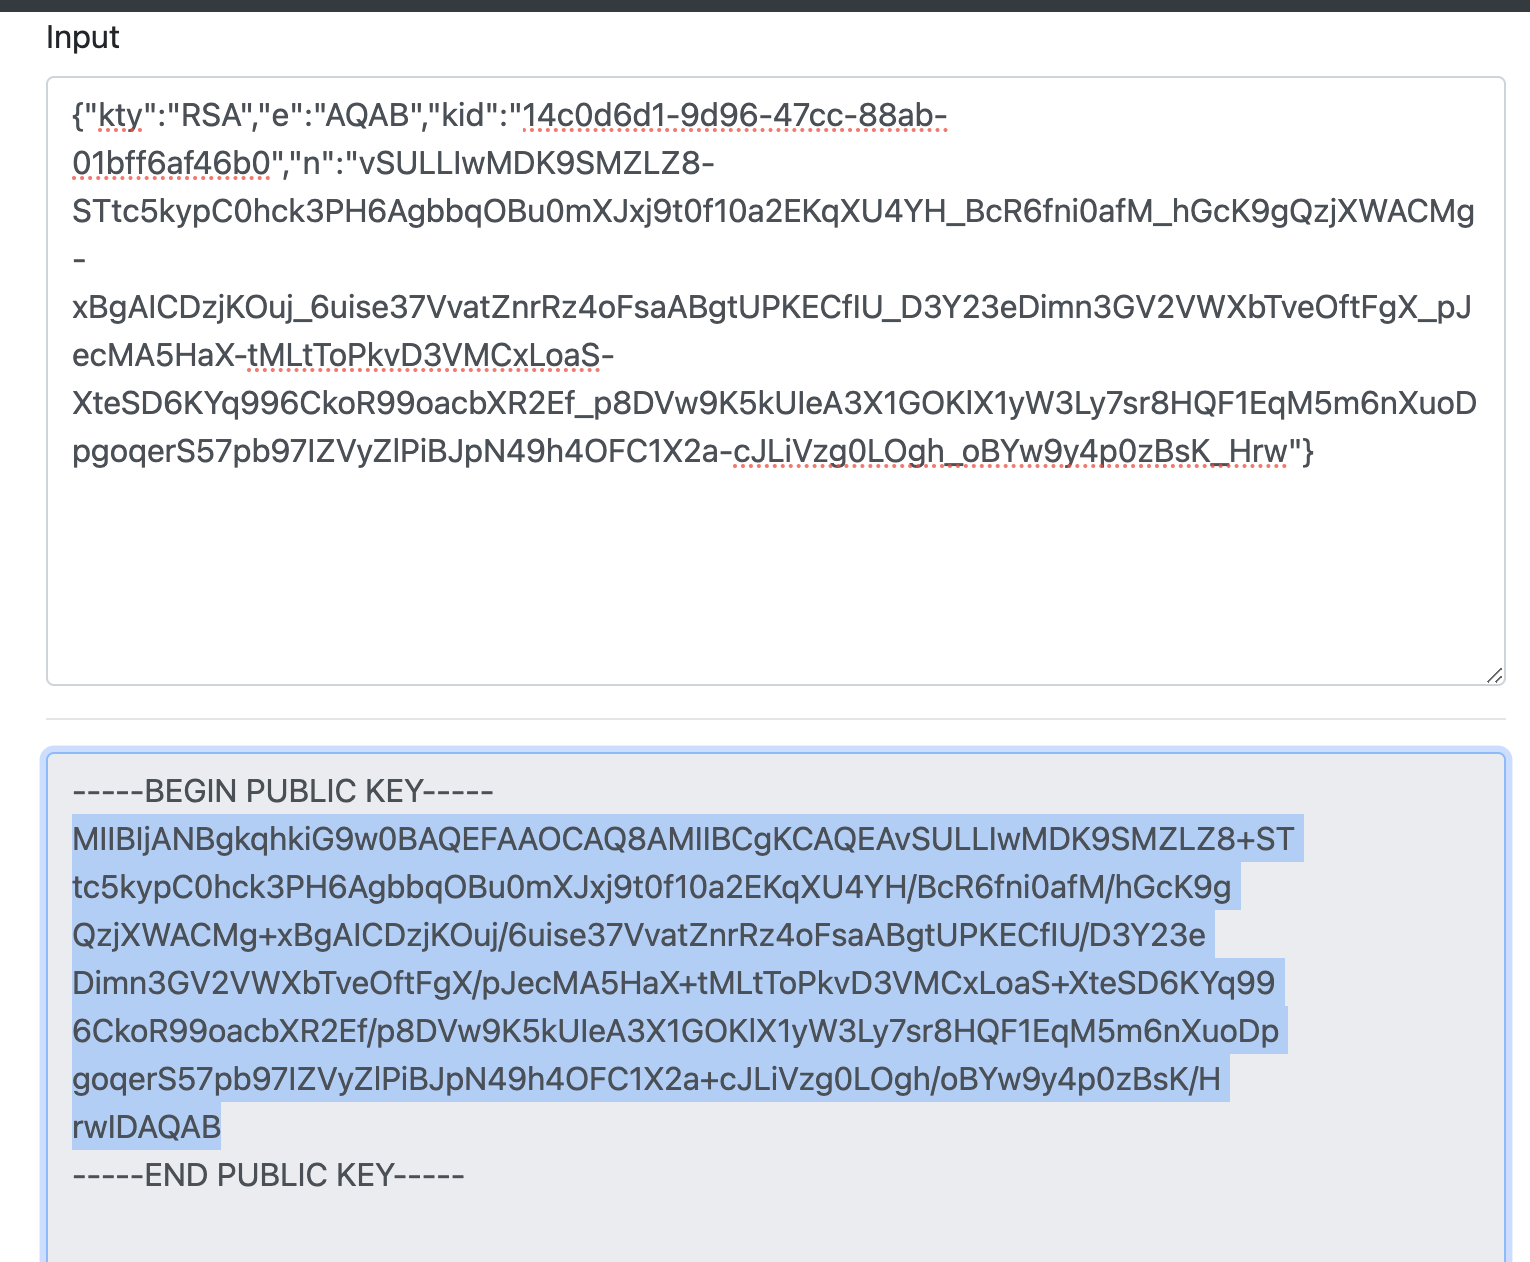
Convert the JWK to PEM. You can use the online tool or other tools.
-
Copy the public key and remove the character
\n, which gives you the signing key. -
Put the signing key and the server details in
my-values.yaml, then apply the values with the install command from Install with Helm.my-values.yamlgravitino:
authenticators: "oauth,basic"
authenticator:
oauth:
serviceAudience: "test"
defaultSignKey: "{static_signing_key}"
tokenPath: "/oauth2/token"
serverUri: "http://{oauth_host}:8177" -
Open the UI and sign in with clientId
test, clientSecrettest, and scopetest.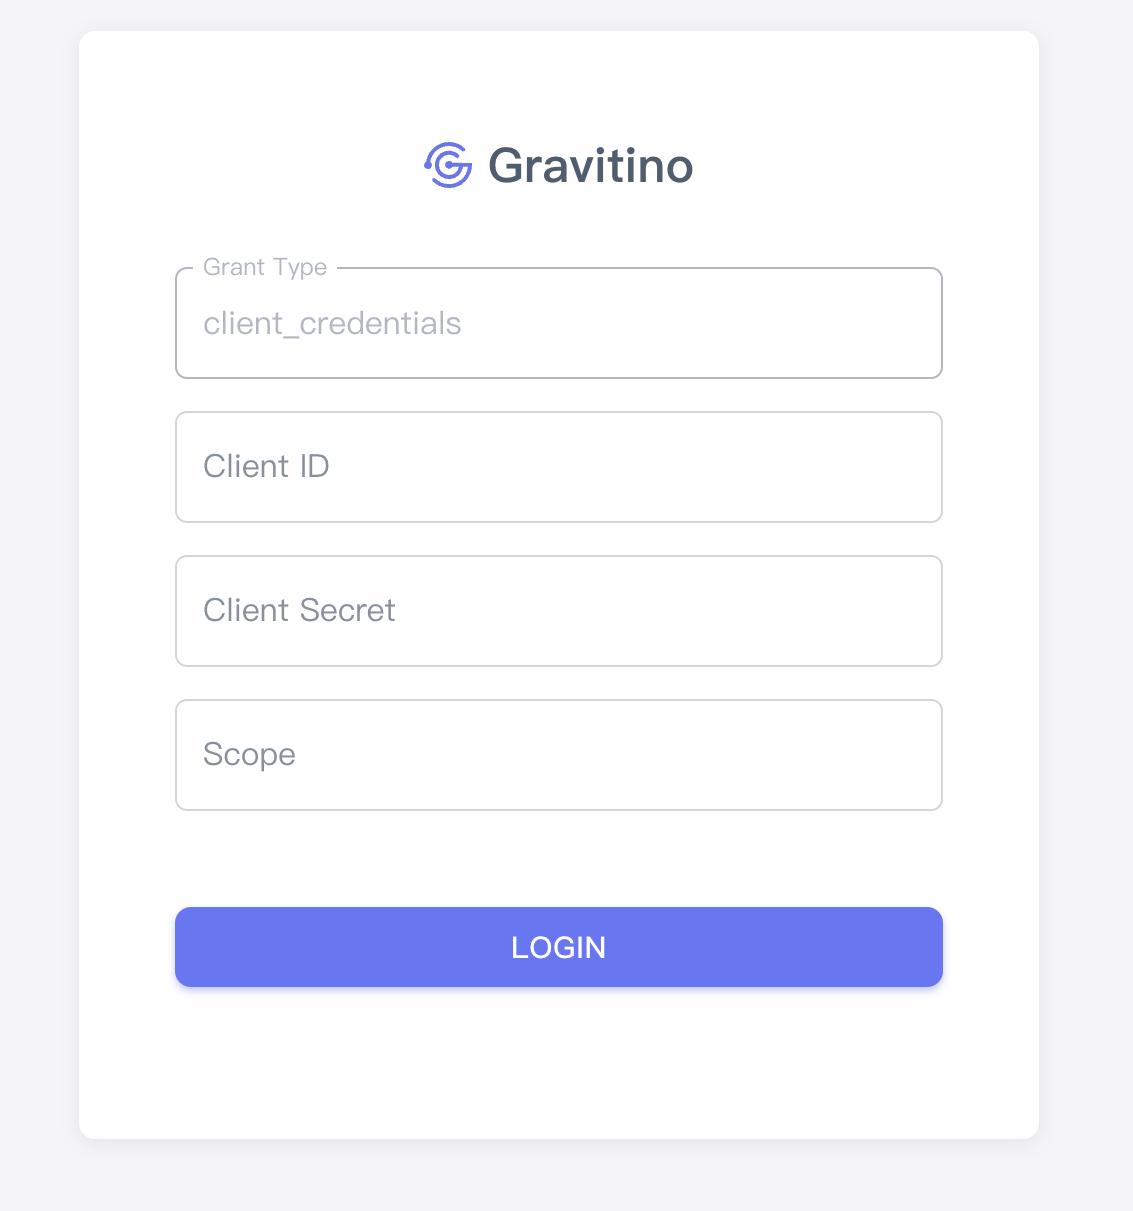
-
Use the curl command to access Gravitino.
Get an access tokencurl --location --request POST 'http://127.0.0.1:8177/oauth2/token?grant_type=client_credentials&client_id=test&client_secret=test&scope=test'Call the server with the access tokencurl -v -X GET -H "Accept: application/vnd.gravitino.v1+json" -H "Content-Type: application/json" -H "Authorization: Bearer {access_token}" http://localhost:8090/api/version
Configure Keycloak as an OAuth provider
-
Set up an external Keycloak server, you can refer to Keycloak document.
Start Keycloakdocker run -dti -p 8080:8080 -e KC_BOOTSTRAP_ADMIN_USERNAME=admin -e KC_BOOTSTRAP_ADMIN_PASSWORD=admin quay.io/keycloak/keycloak:26.2.5 start-dev -
Go to the Keycloak admin console, log in with the initial admin user with the username
adminand passwordadmin. -
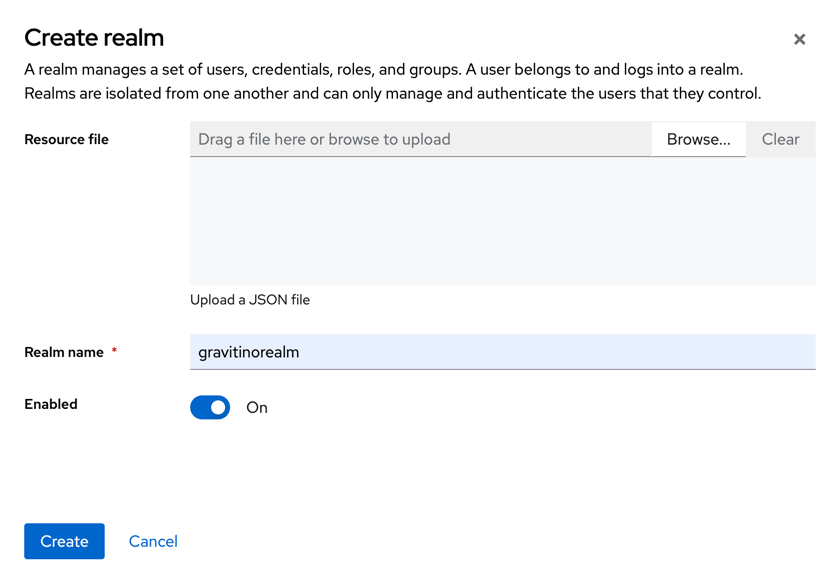
Create a realm for Gravitino.
- Click Manage realms in the left-hand menu.
- Click Create realm button
-
Get the
gravitinorealmpublic key, which becomes the signing key in the values below.Access
http://localhost:8080/realms/gravitinorealmin browser
-
Add users.
Initially, the realm has no users. Use these steps to create a user:
- Verify that you are still in the gravitinorealm realm, which is next to Current realm.
- Click Users in the left-hand menu.
- Click Create new user.
- Fill in the form with the following values:
Username: usera, First name: any first name, Last name: any last name, Email: any email - Click credentials, fill in the Set password form with a password.
- Toggle Temporary to Off so that the user does not need to update this password at the first login.
You can now log in to the Account Console(gravitinorealm) to verify this user is configured correctly.
-
Register Gravitino in Keycloak.
- Click gravitinorealm next to Current realm.
- Click Clients.
- Click Create client
- Fill in Client type:
OpenID ConnectClient ID:gravitino-client - Click Next
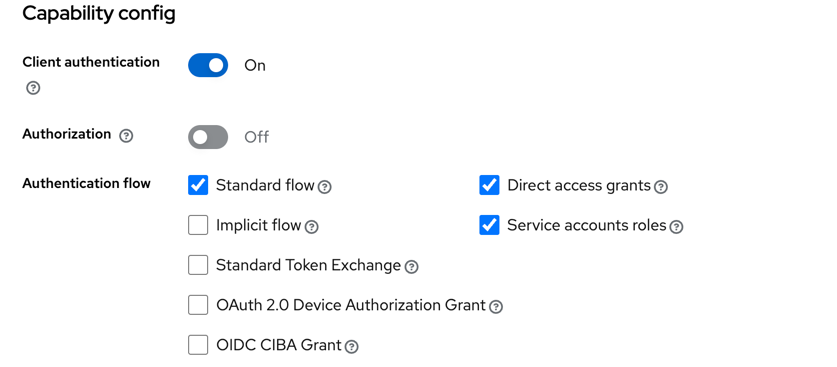
- Confirm that
Client authenticationStandard flowDirect access grantsService accounts rolesis enabled. - Click Next
- Set Valid redirect URIs to
http://localhost:8090/* - Set Web origins to
http://localhost:8090 - Click Save.
- Click Credentials tab page, get
Client Secret.
-
Put the realm details in
my-values.yaml, then apply the values with the install command from Install with Helm.my-values.yamlgravitino:
authenticators: "oauth,basic"
authenticator:
oauth:
serviceAudience: "account"
defaultSignKey: "{static_signing_key}"
tokenPath: "/realms/gravitinorealm/protocol/openid-connect/token"
serverUri: "http://{oauth_host}:8080" -
Use client credentials to authenticate. The
access tokenis bound to a service account.Get an access token with client credentialscurl \
-d "client_id=gravitino-client" \
-d "client_secret=FL20ezBgQAOlDQeNifzwliQ56wohhqNo" \
-d "grant_type=client_credentials" \
"http://localhost:8080/realms/gravitinorealm/protocol/openid-connect/token"Call the server with the access tokencurl -v -X GET -H "Accept: application/vnd.gravitino.v1+json" -H "Content-Type: application/json" -H "Authorization: Bearer {access_token}" http://localhost:8090/api/version -
Use password to authenticate users. The openid scope returns an
id_tokenthat includes user information which can be used for consumer mapping and group mapping in future posts.Get an access token with a passwordcurl \
-d "client_id=gravitino-client" \
-d "client_secret=FL20ezBgQAOlDQeNifzwliQ56wohhqNo" \
-d "username=usera" \
-d "password=Admin@123" \
-d "grant_type=password" \
-d "scope=openid" \
"http://localhost:8080/realms/gravitinorealm/protocol/openid-connect/token"Call the server with the access tokencurl -v -X GET -H "Accept: application/vnd.gravitino.v1+json" -H "Content-Type: application/json" -H "Authorization: Bearer {access_token}" http://localhost:8090/api/versionFor the Gravitino Iceberg REST Service, the 'Accept: application/vnd.gravitino.v1+json' header is not required.
Call the Iceberg REST service with the tokencurl -v -X GET -H "Content-Type: application/json" -H "Authorization: Bearer {access_token}" http://127.0.0.1:9001/iceberg/v1/config
Enable Web UI OIDC login with Keycloak
The gravitino-client registered above is a confidential client used for machine-to-machine flows
(client credentials and password grants). The browser cannot use a confidential client because it
cannot keep a client secret, so browser sign-in requires a separate public client. A typical Keycloak
deployment therefore uses two clients:
| Client | Type | Used by | Keycloak settings |
|---|---|---|---|
gravitino-client | Confidential | Engines and machine flows (CLI, connectors, service accounts) | Client authentication on, Standard flow and Service accounts roles enabled |
gravitino-ui | Public | Browser sign-in | Client authentication off, Standard flow enabled |
To register the public client for the UI:
- Click Clients in the
gravitinorealmrealm, then Create client. - Fill in Client type:
OpenID Connect, Client ID:gravitino-ui, then click Next. - Turn Client authentication off (this makes it a public client) and enable Standard flow. Click Next.
- Set Valid redirect URIs to
https://{gravitino_host}/ui/oauth/callback. - Set Valid post logout redirect URIs to
https://{gravitino_host}/*so logout can redirect back to the UI. - Set Web origins to
https://{gravitino_host}. - Click Save.
Then point token validation and browser sign-in at the realm:
gravitino:
  authenticators: "oauth,basic"
  authenticator:
    oauth:
      provider: "oidc"
      clientId: "gravitino-ui"
      authority: "http://{oauth_host}:8080/realms/gravitinorealm"
      scope: "openid profile email"
      jwksUri: "http://{oauth_host}:8080/realms/gravitinorealm/protocol/openid-connect/certs"
      tokenValidatorClass: "org.apache.gravitino.server.authentication.JwksTokenValidator"
      serviceAudience: "account"
      principalFields: "preferred_username,email,sub"
  browserSso:
    issuer: "http://{oauth_host}:8080/realms/gravitinorealm"
    clientId: "gravitino-ui"
    clientSecret: "{client_secret}"
    name: "Keycloak"
    scope: "openid profile email"
The example uses JWKS-based validation, where the server fetches Keycloak's public keys from
jwksUri automatically, so the static-key settings (defaultSignKey, serverUri, and tokenPath)
from the machine-flow example above are unnecessary. JWKS validation is recommended for Keycloak; set
the static-key settings only when you intentionally use
tokenValidatorClass: "org.apache.gravitino.server.authentication.StaticSignKeyValidator" instead.
One server configuration validates tokens from both the browser and the machine clients, so no
separate validator per client is needed.
Browser sign-in requires a secure context:
serve the UI over HTTPS or reach it at localhost. See the secure-context note in the
OAuth Mode section for details.
Align the token issuer for split-hostname deployments
The iss (issuer) claim in a Keycloak token is built from the hostname the token was obtained
through. When the browser and the Gravitino server reach Keycloak through different hostnames (for
example, the browser uses a public URL while the server uses an internal cluster hostname), the iss
claim in the browser-issued token will not match the authority the server expects, and validation
fails with an error such as JWT iss claim value rejected.
To keep the issuer consistent regardless of which hostname is used to reach Keycloak, set a unified Frontend URL on the realm:
- Open the
gravitinorealmrealm, go to Realm settings > General. - Set Frontend URL to the canonical, externally reachable Keycloak base URL (for example,
https://keycloak.example.com). - Save, then use that same base URL in
gravitino.authenticator.oauth.authority, the matchingjwksUri, andgravitino.browserSso.issuer.
With the Frontend URL set, Keycloak stamps the same iss claim on every token regardless of the
hostname the request arrived on, so browser-issued and server-validated tokens agree.