Gravitino web UI
This document primarily outlines how users can manage metadata within Gravitino using the web UI, the graphical interface is accessible through a web browser as an alternative to writing code or using the REST interface.
Currently, you can integrate OAuth settings to view, add, modify, and delete metalakes, create catalogs, and view catalogs, schemas, and tables, among other functions.
More features are under development. For the details, please refer to the Manage metadata using Gravitino document.
Build and deploy the Gravitino Web UI and open it in a browser at http://<gravitino-host>:<gravitino-port>, by default is http://localhost:8090.
Initial page
The web UI homepage displayed in Gravitino depends on the configuration parameter for OAuth mode, see the details in Security.
Set parameter for gravitino.authenticator, simple or oauth.
After changing the configuration, make sure to restart the Gravitino server.
<path-to-gravitino>/bin/gravitino.sh restart
Simple mode
gravitino.authenticator = simple
Set the configuration parameter gravitino.authenticator to simple, and the web UI displays the homepage (Metalakes).
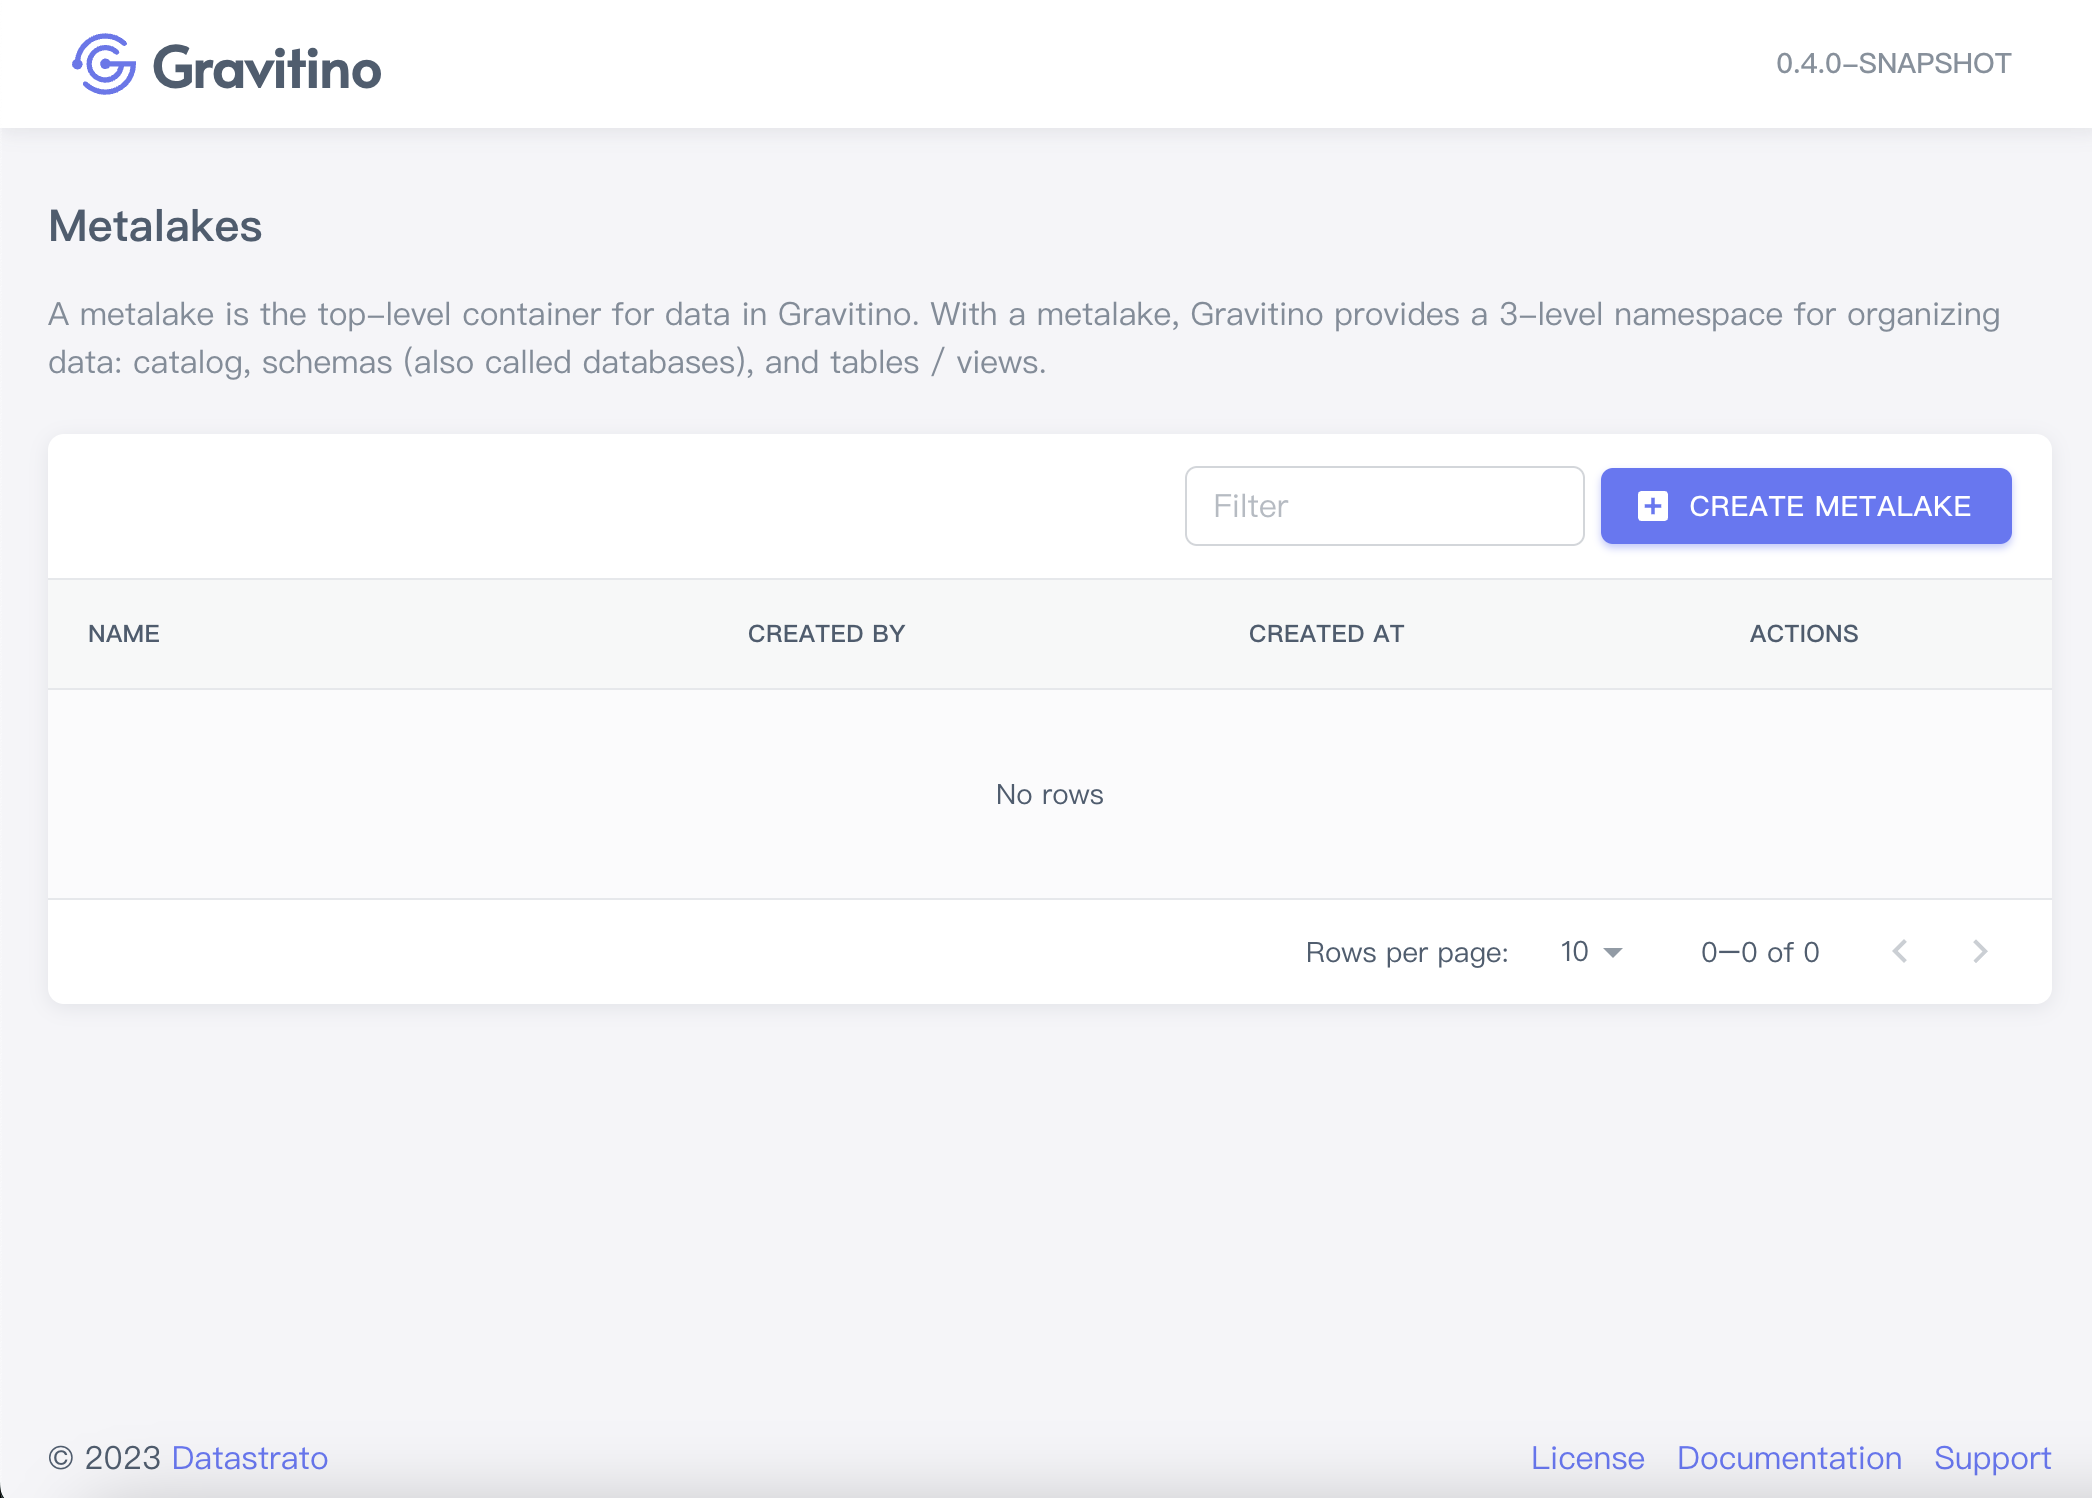
At the top-right, the UI displays the current Gravitino version.
The main content displays the existing metalake list.
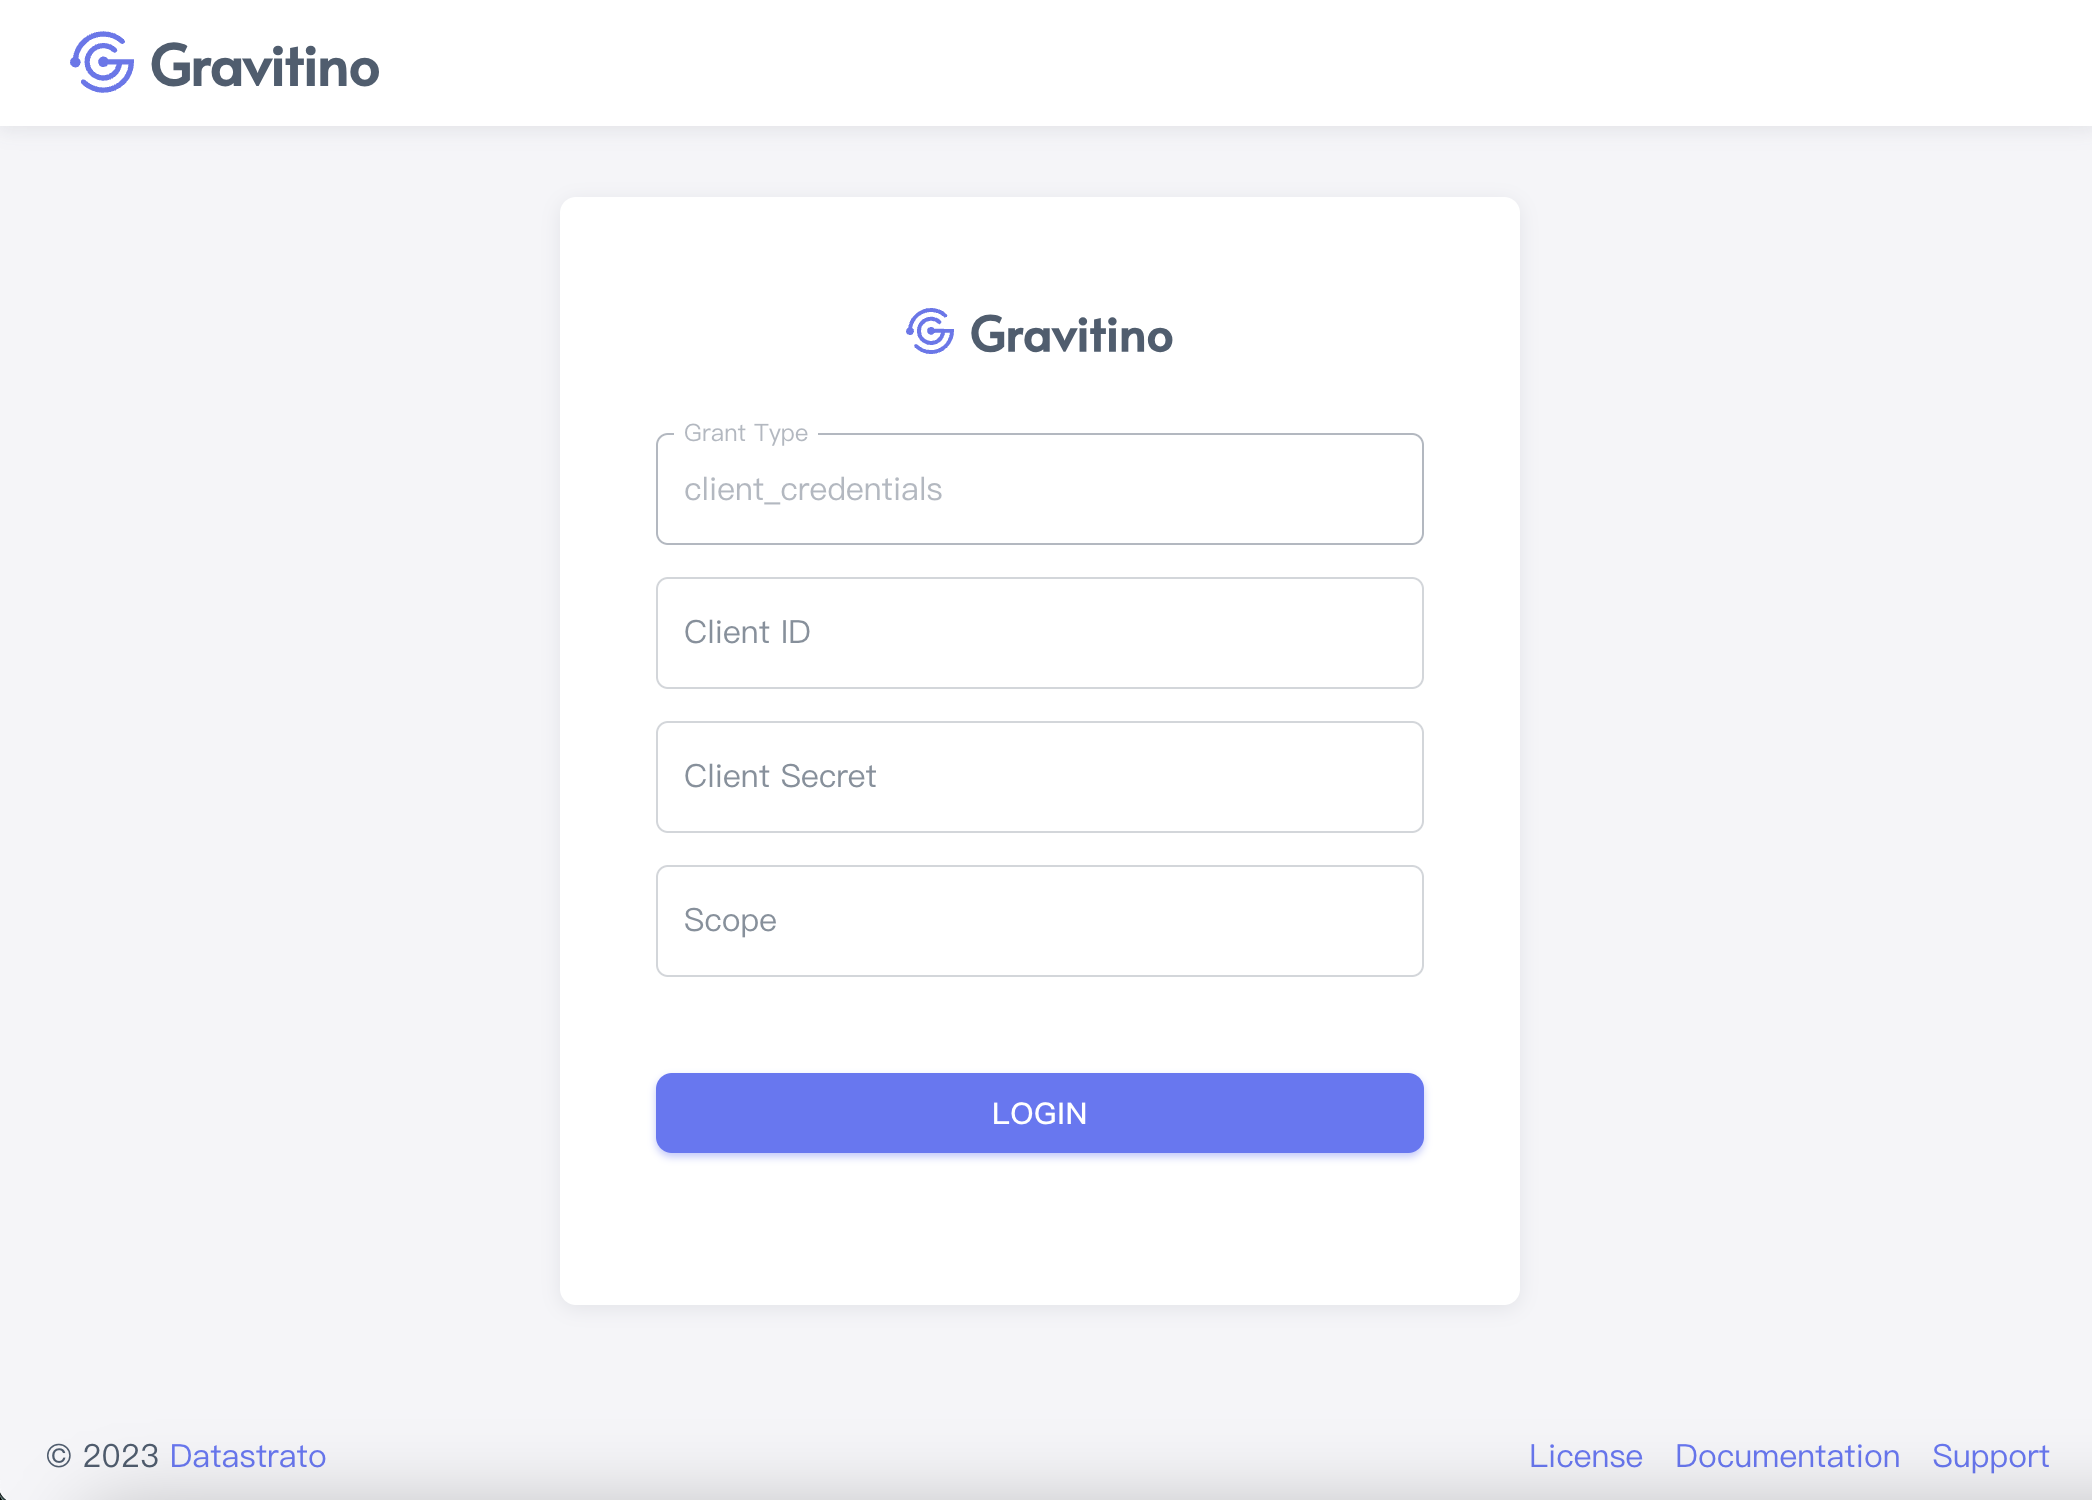
Oauth mode
gravitino.authenticator = oauth
Set the configuration parameter gravitino.authenticator to oauth, and the web UI displays the login page.
-
Enter the values corresponding to your specific configuration. For detailed instructions, please refer to Security.
-
Clicking on the
LOGINbutton takes you to the homepage.
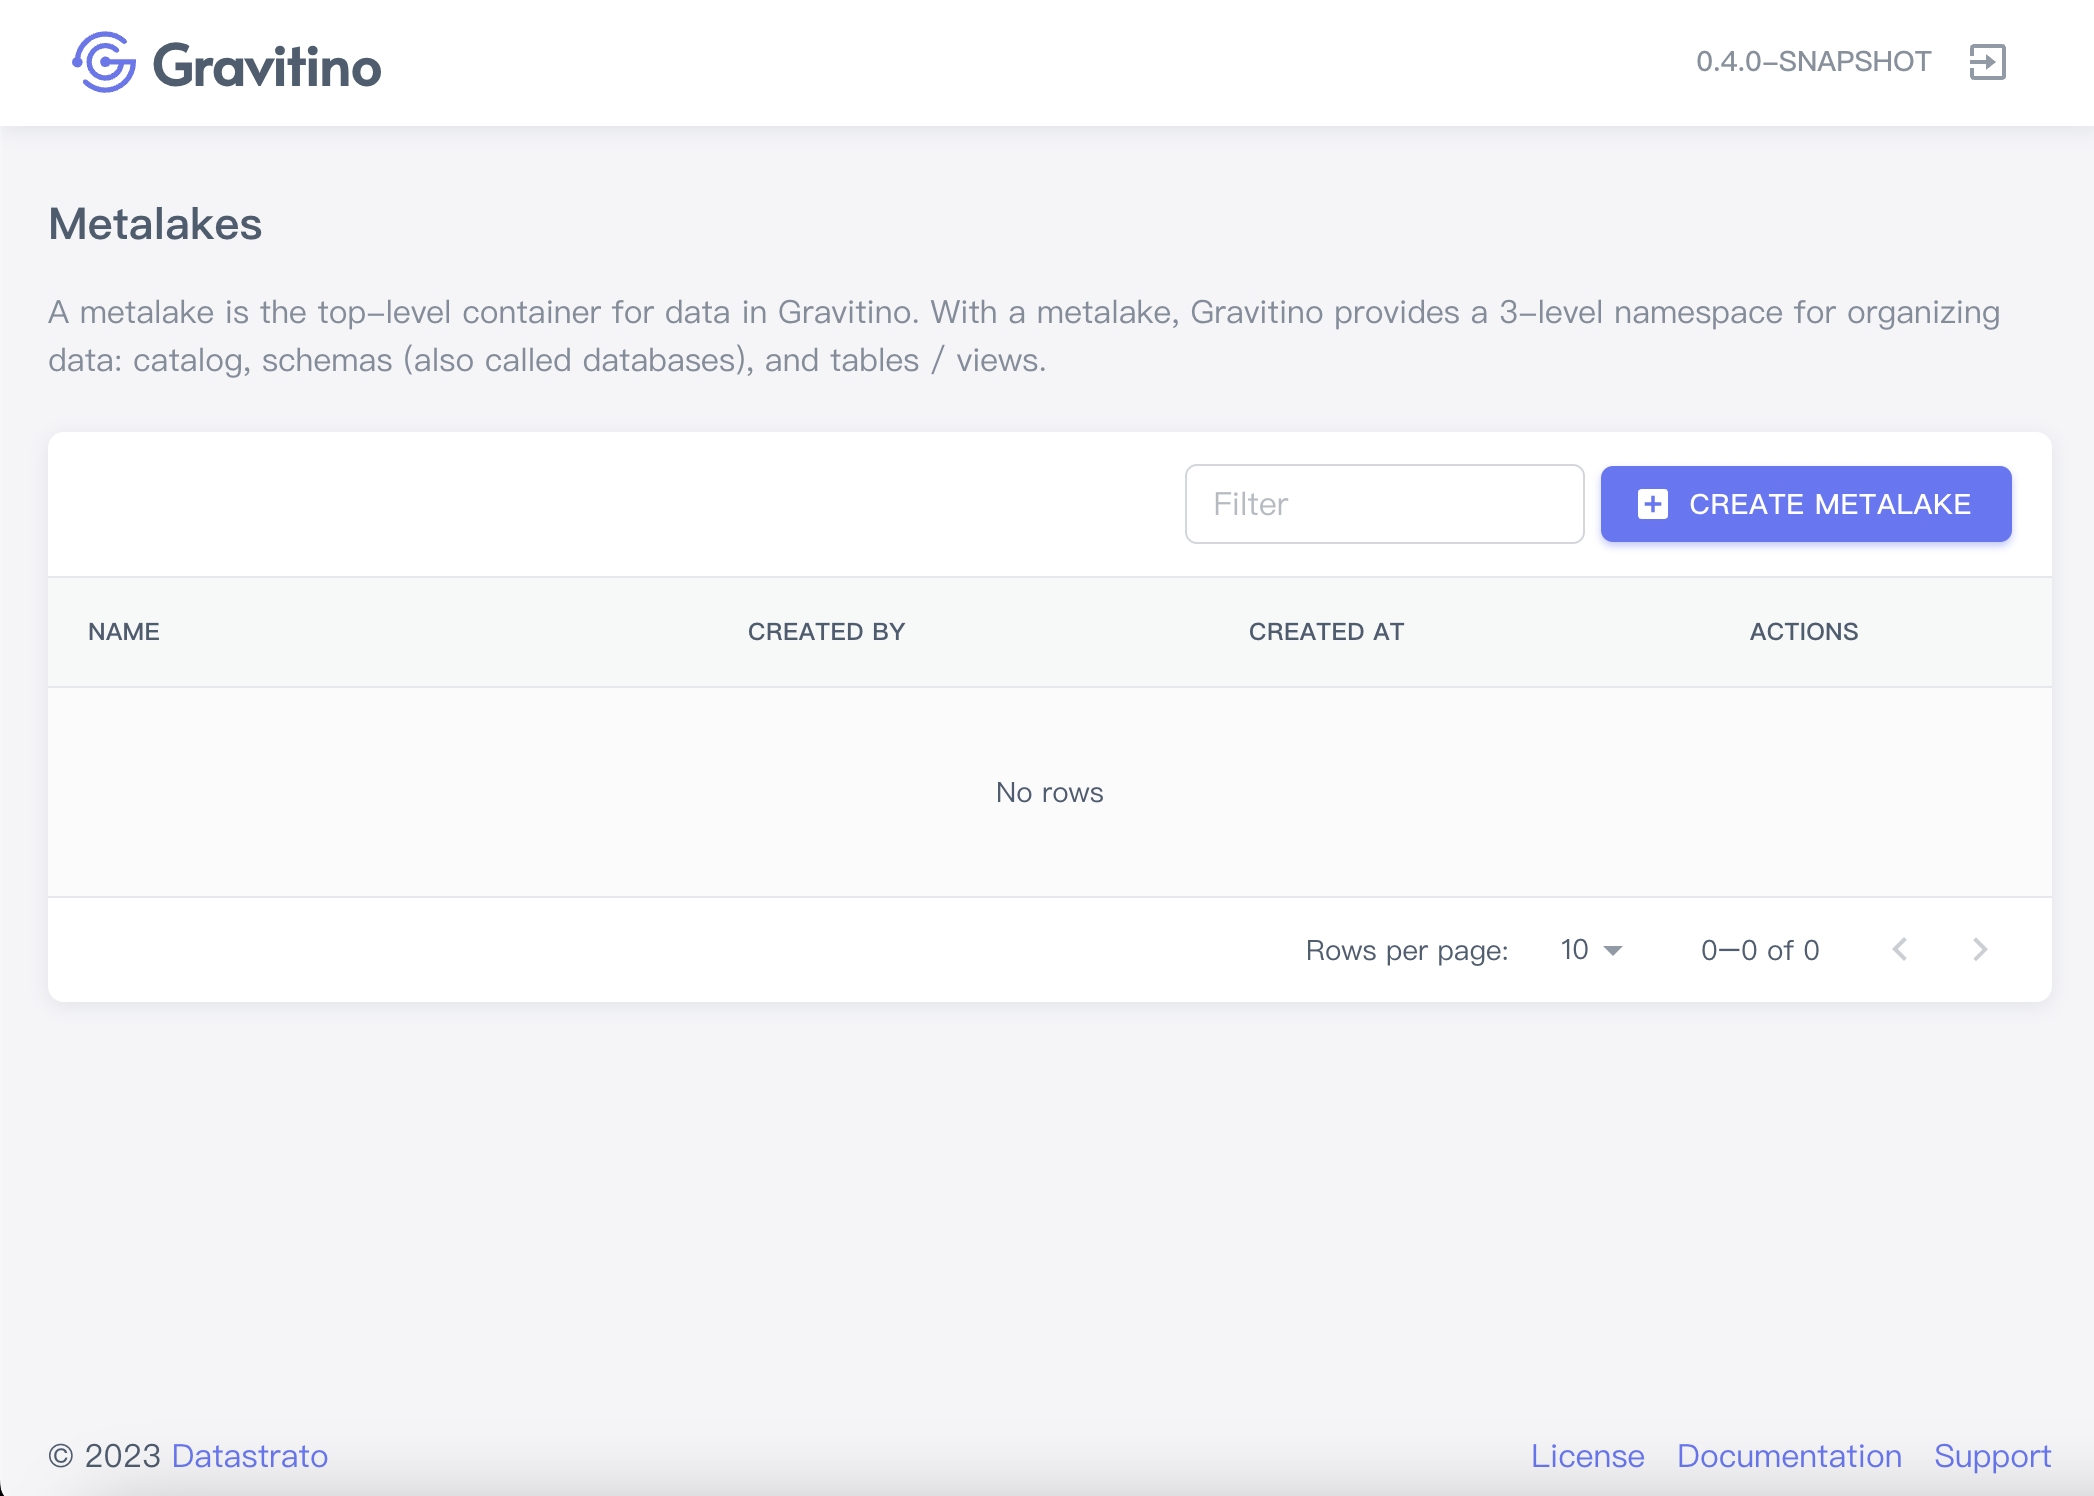
At the top-right, there is an icon button that takes you to the login page when clicked.
Manage metadata
All the manage actions are performed by using the REST API
Metalake
Create a metalake
On the homepage, clicking on the CREATE METALAKE button displays a dialog to create a metalake.

Creating a metalake needs these fields:
- Name(required): the name of the metalake.
- Comment(optional): the comment of the metalake.
- Properties(optional): Click on the
ADD PROPERTYbutton to add custom properties.
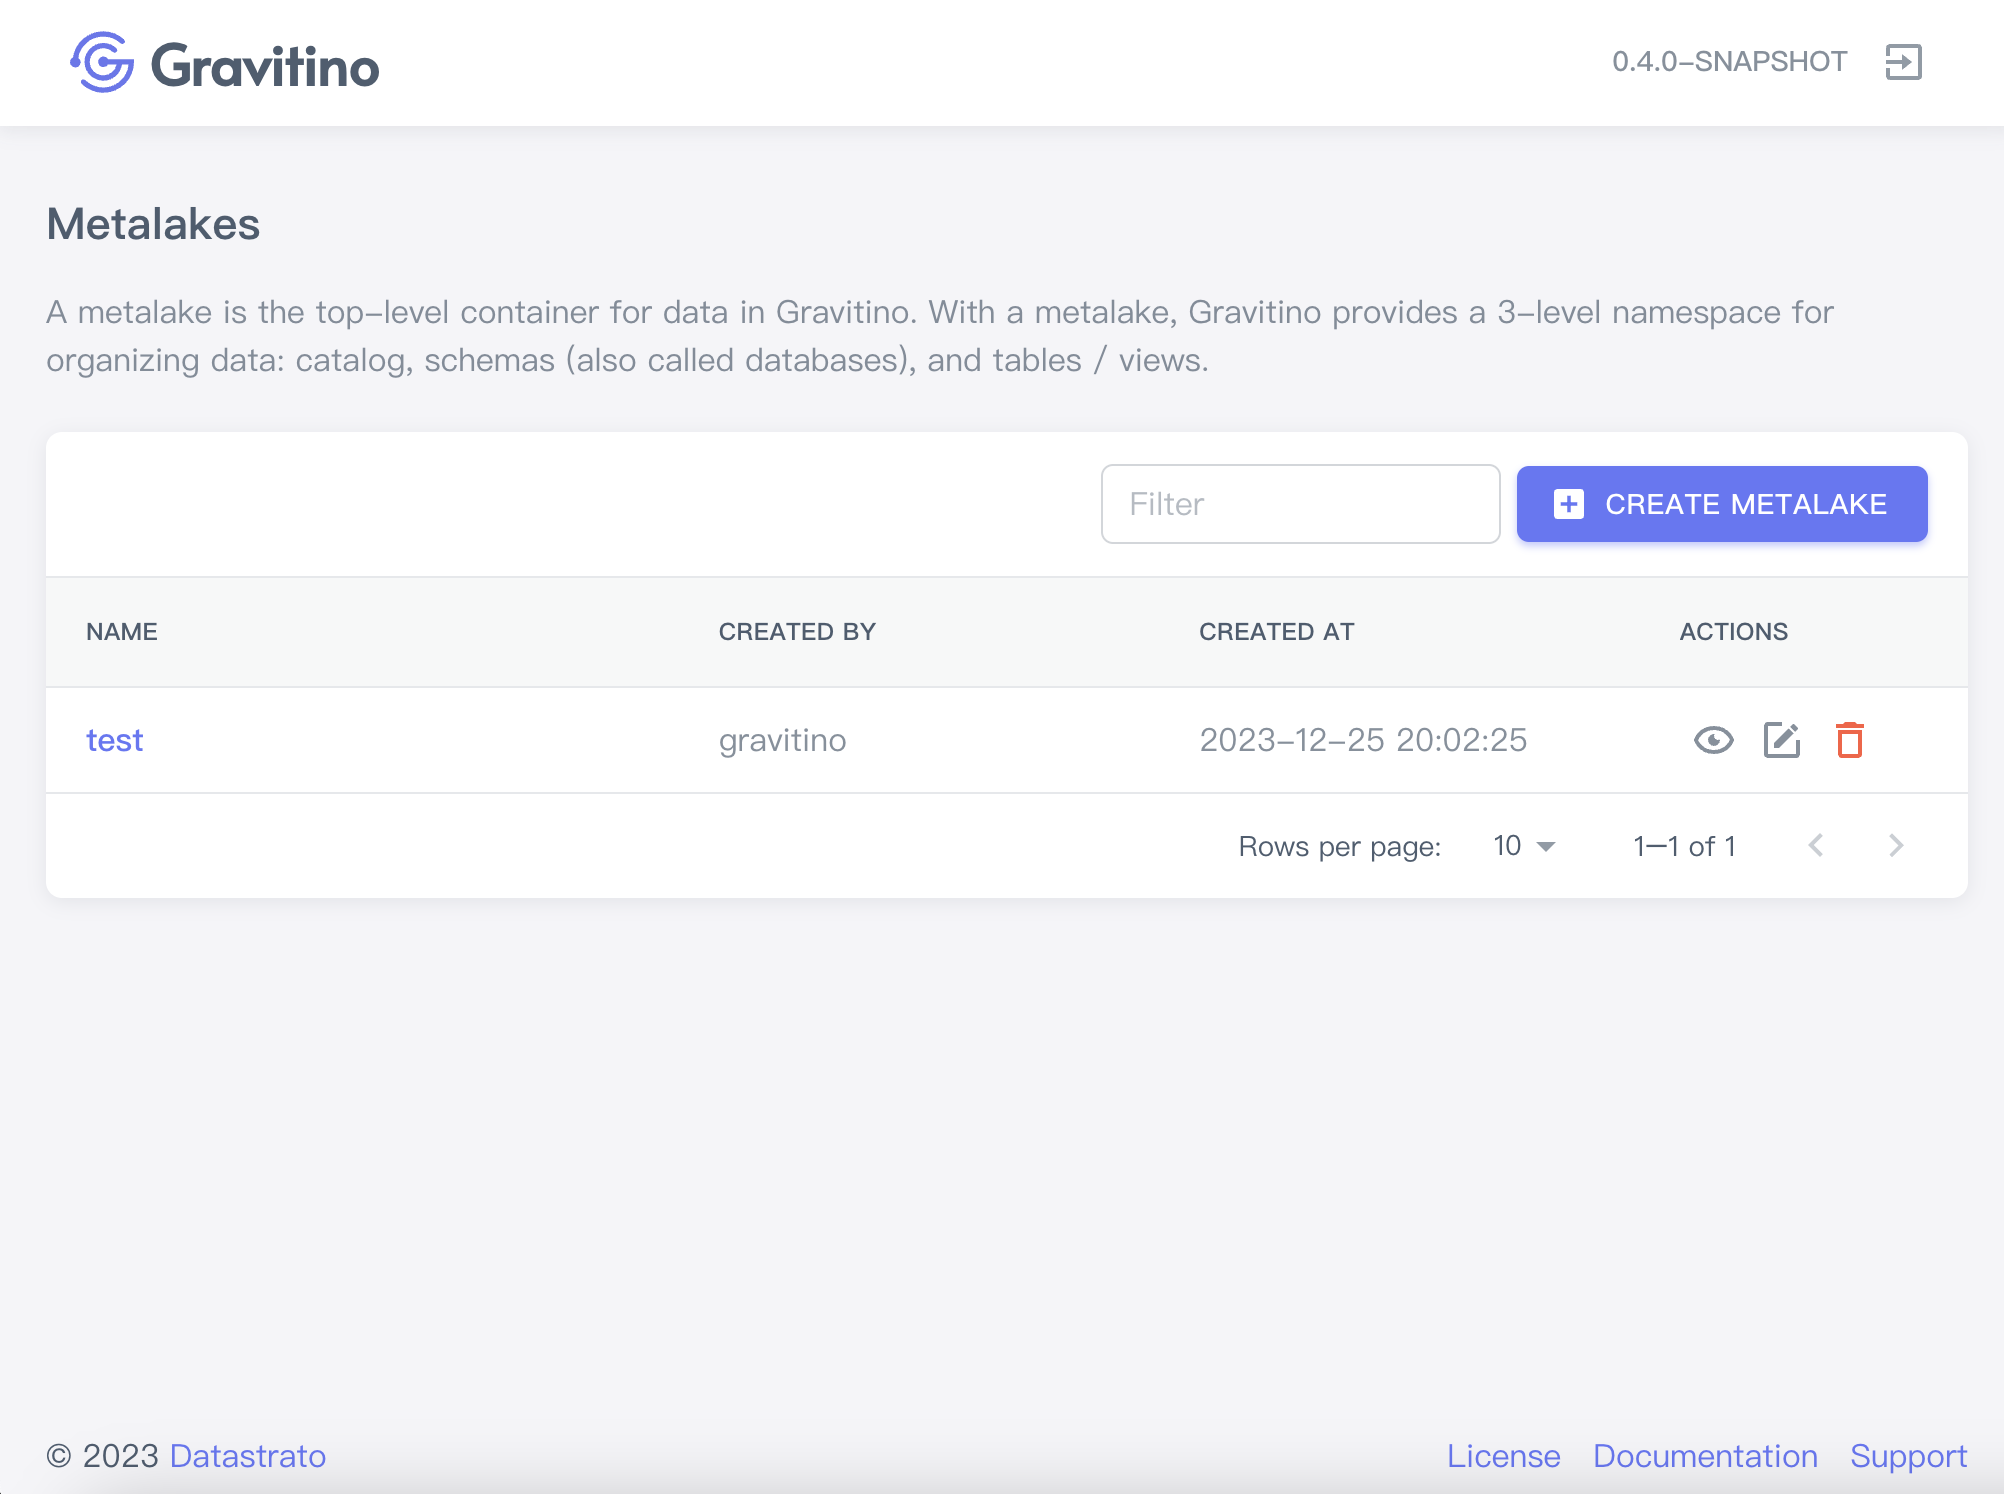
There are 3 actions you can perform on a metalake.

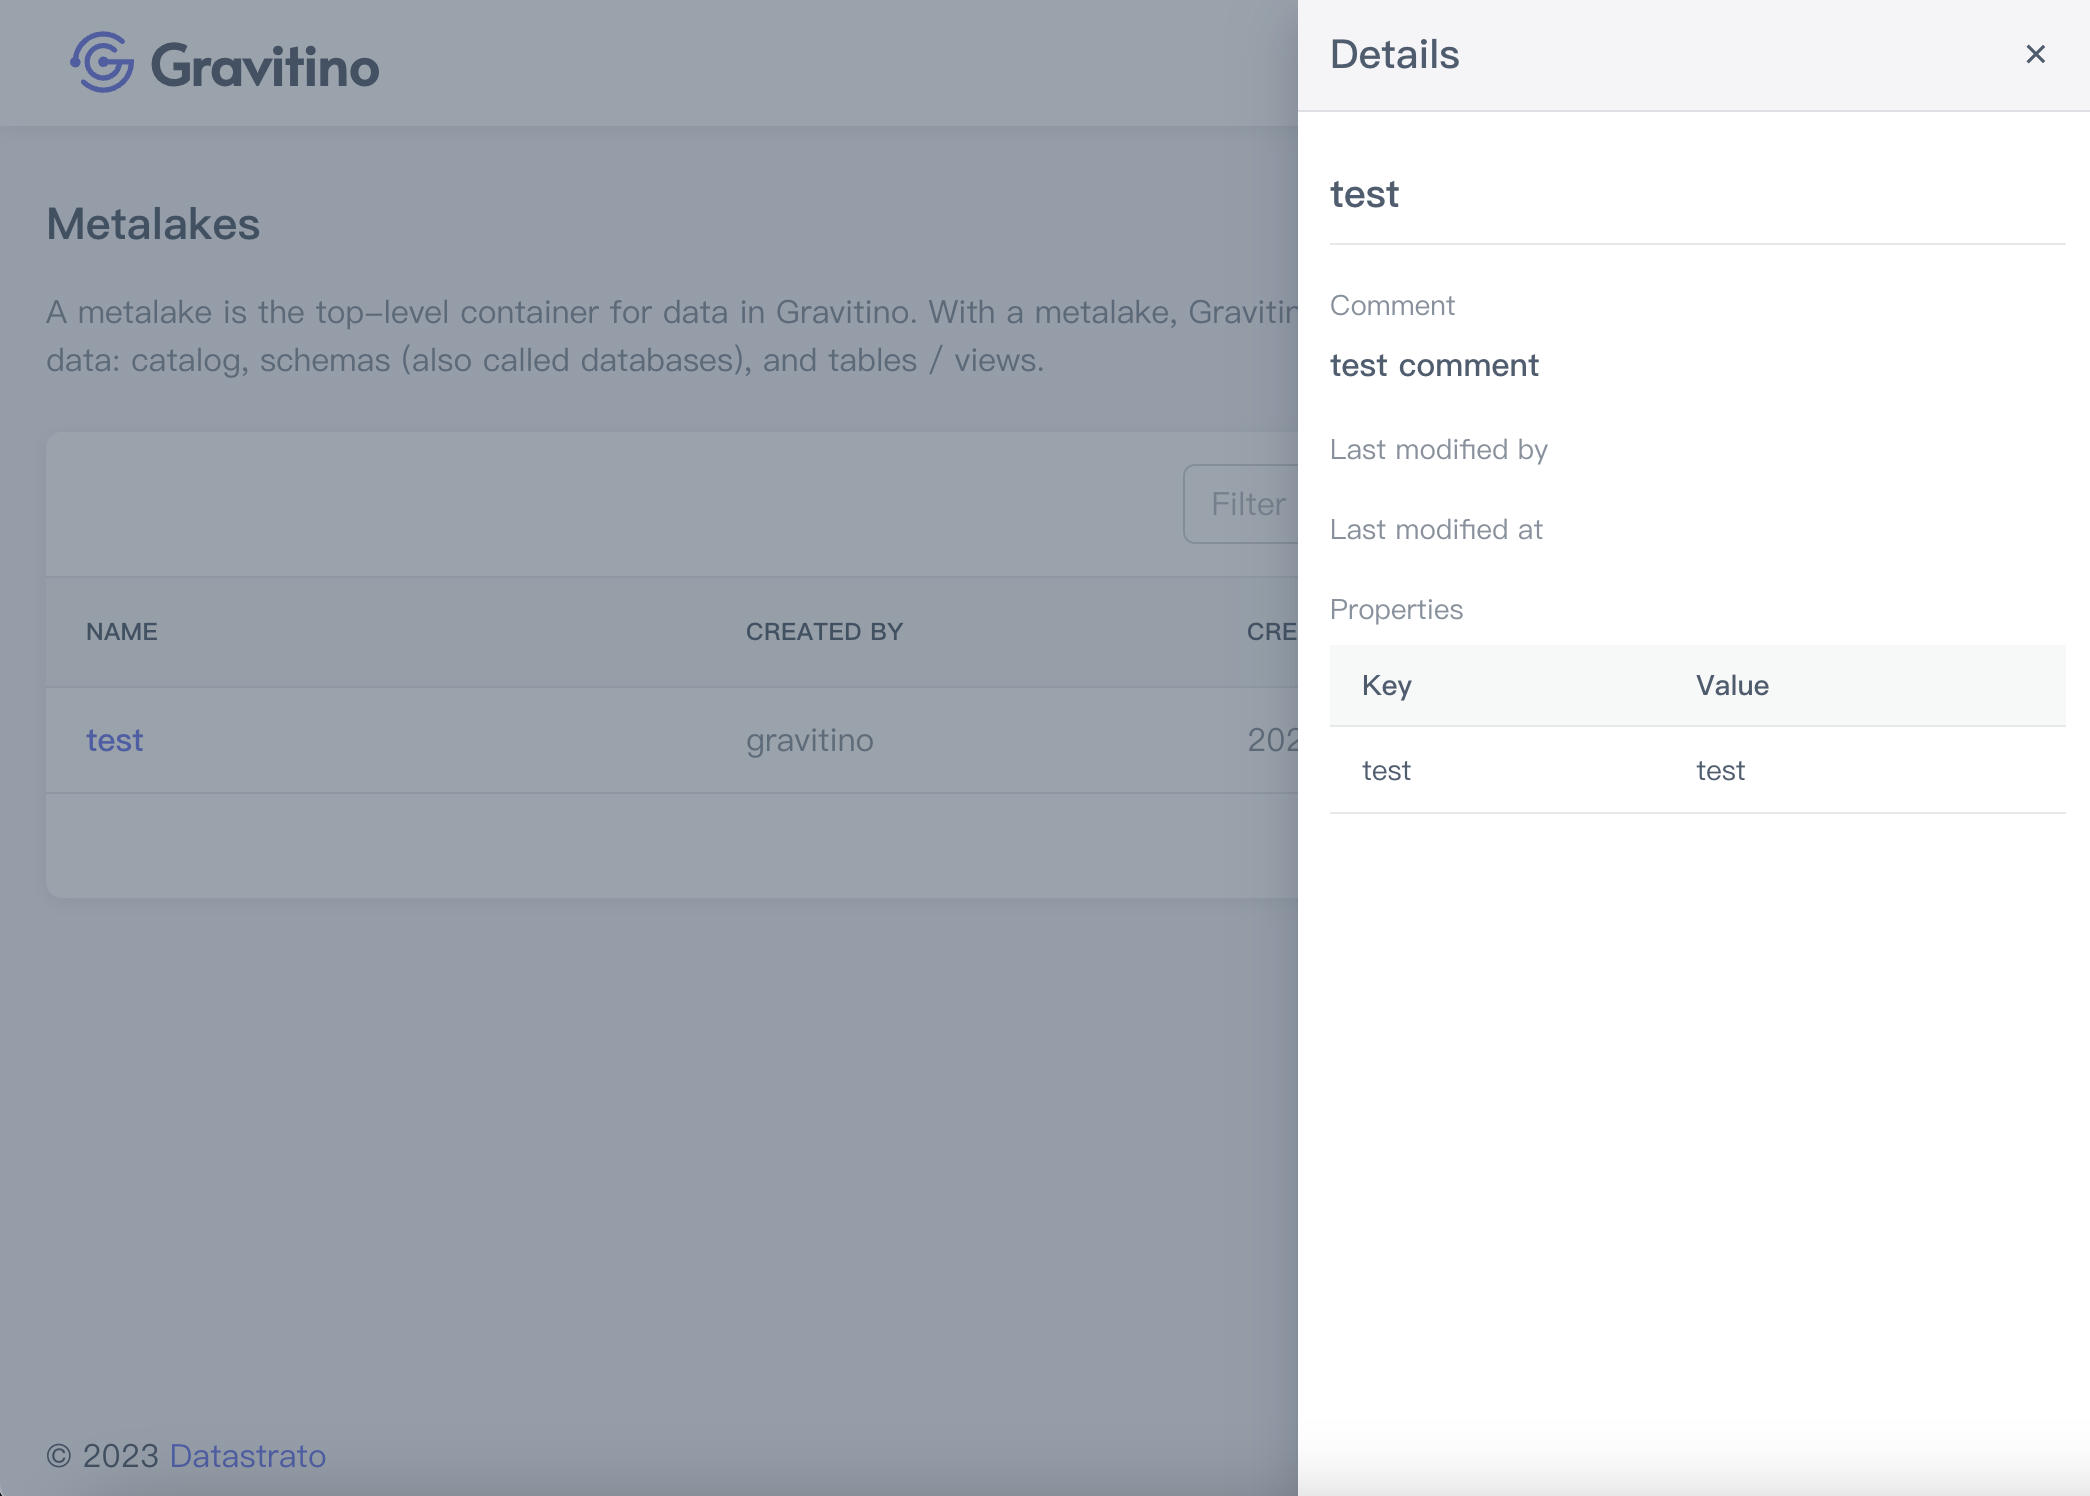
Show metalake details
Edit metalake
Displays a dialog for modifying metalakes fields.
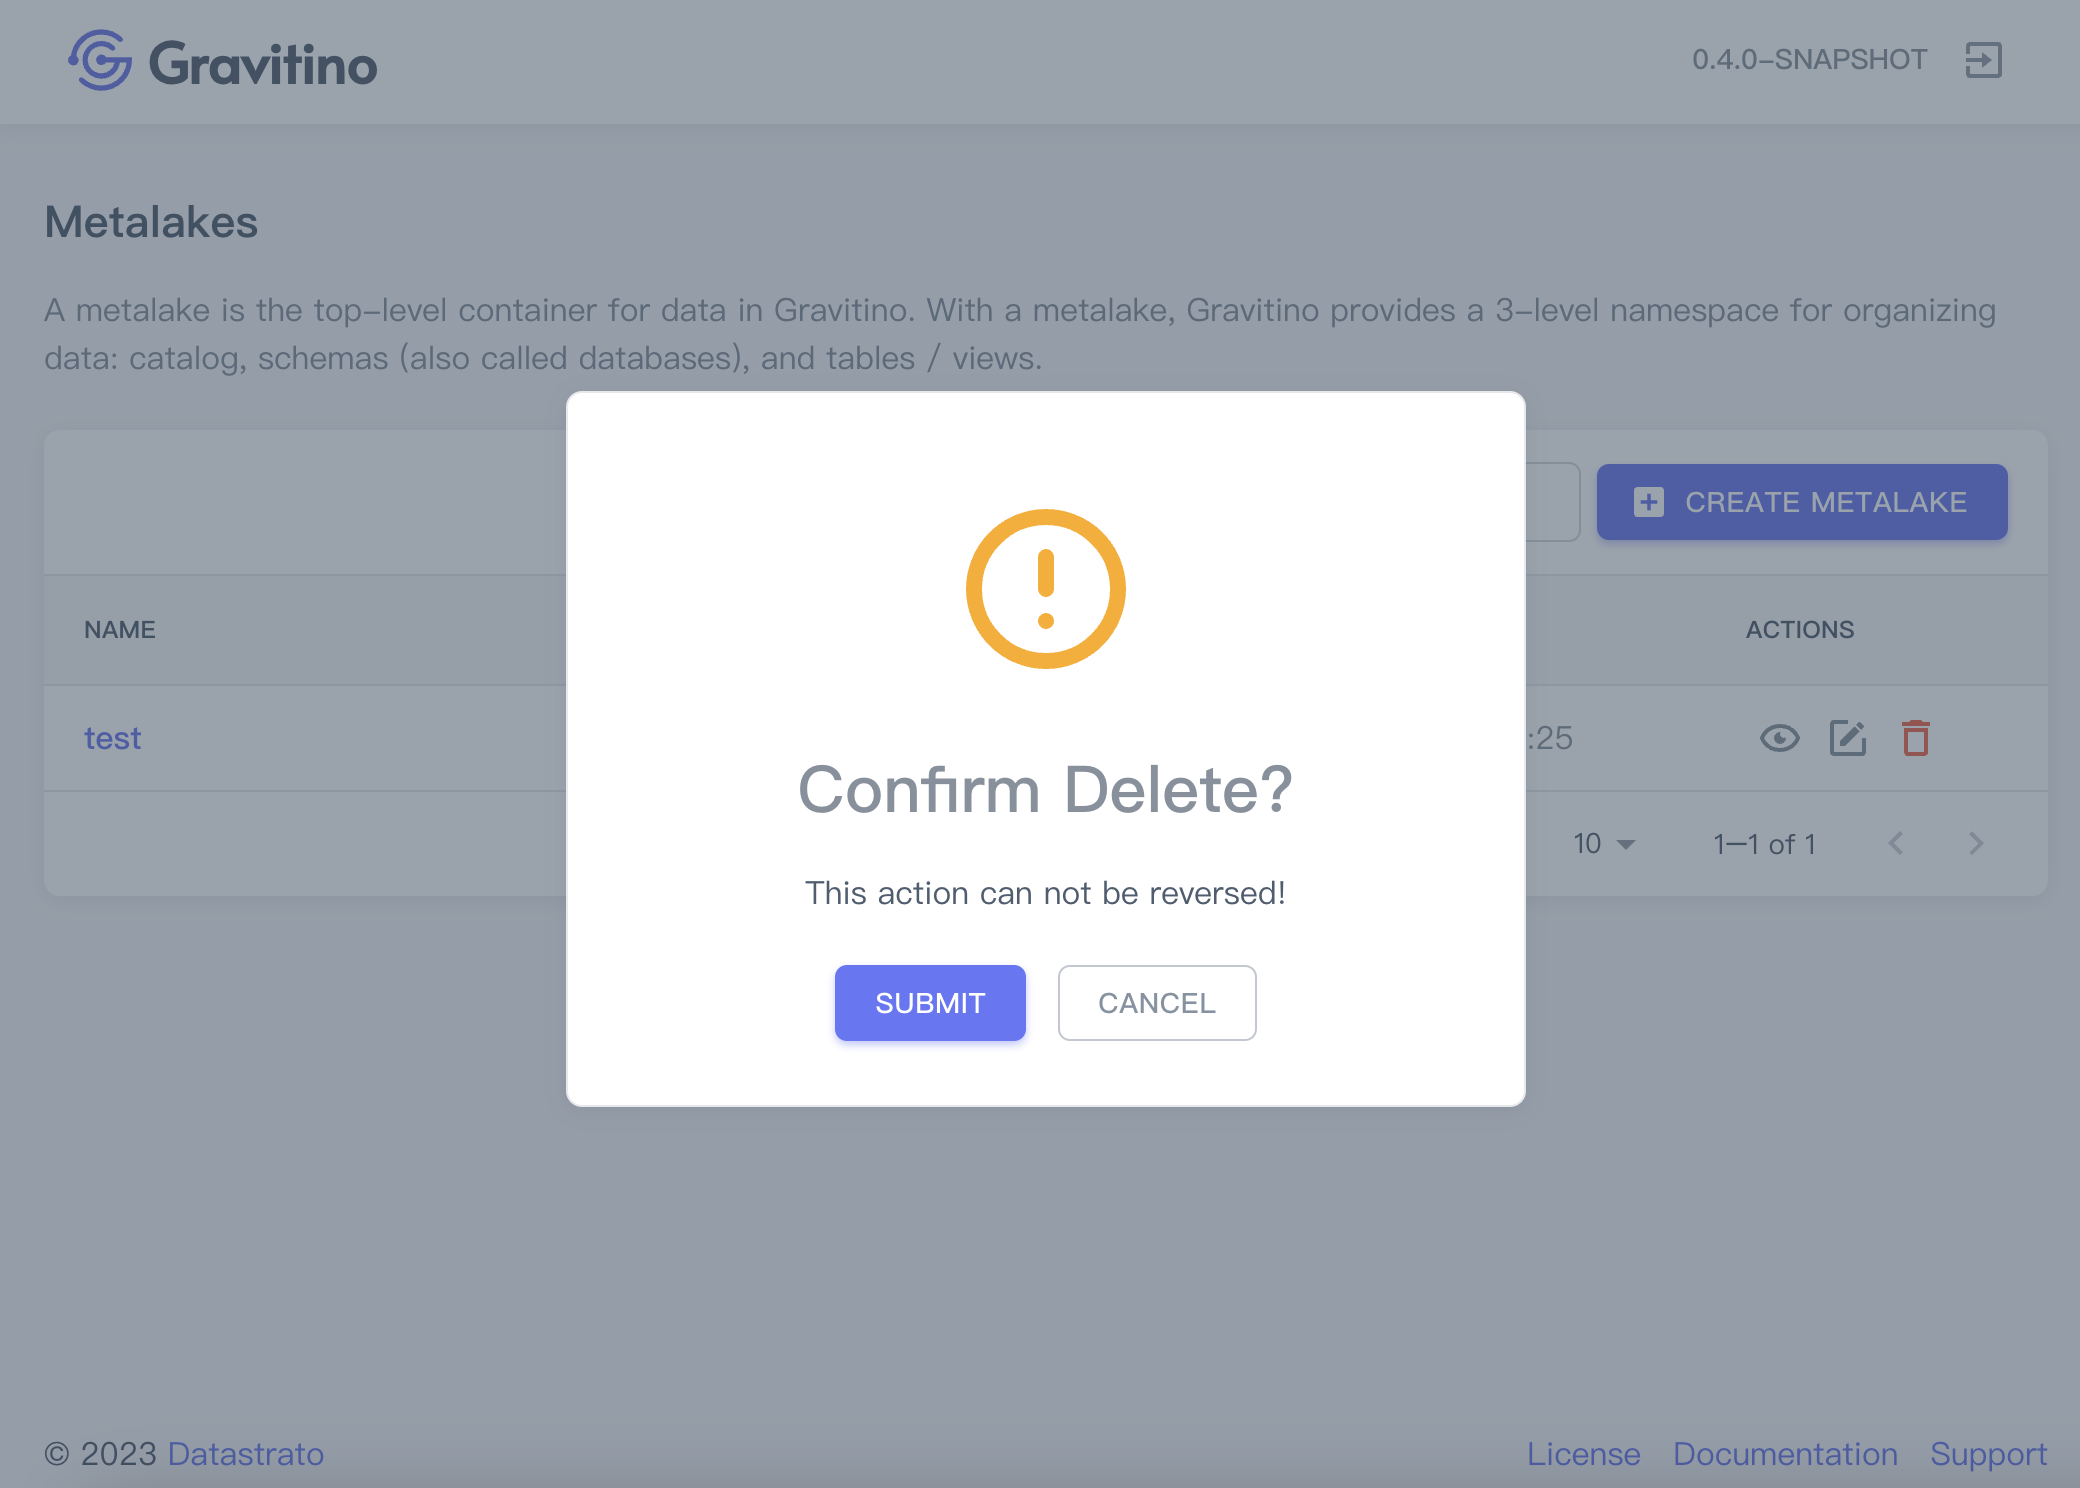
Delete metalake
Displays a confirmation dialog, clicking on the SUBMIT button deletes this metalake.
Catalog
Clicking on a metalake name in the table views catalogs in a metalake.
If this is the first time, it shows no data until after creating a catalog.
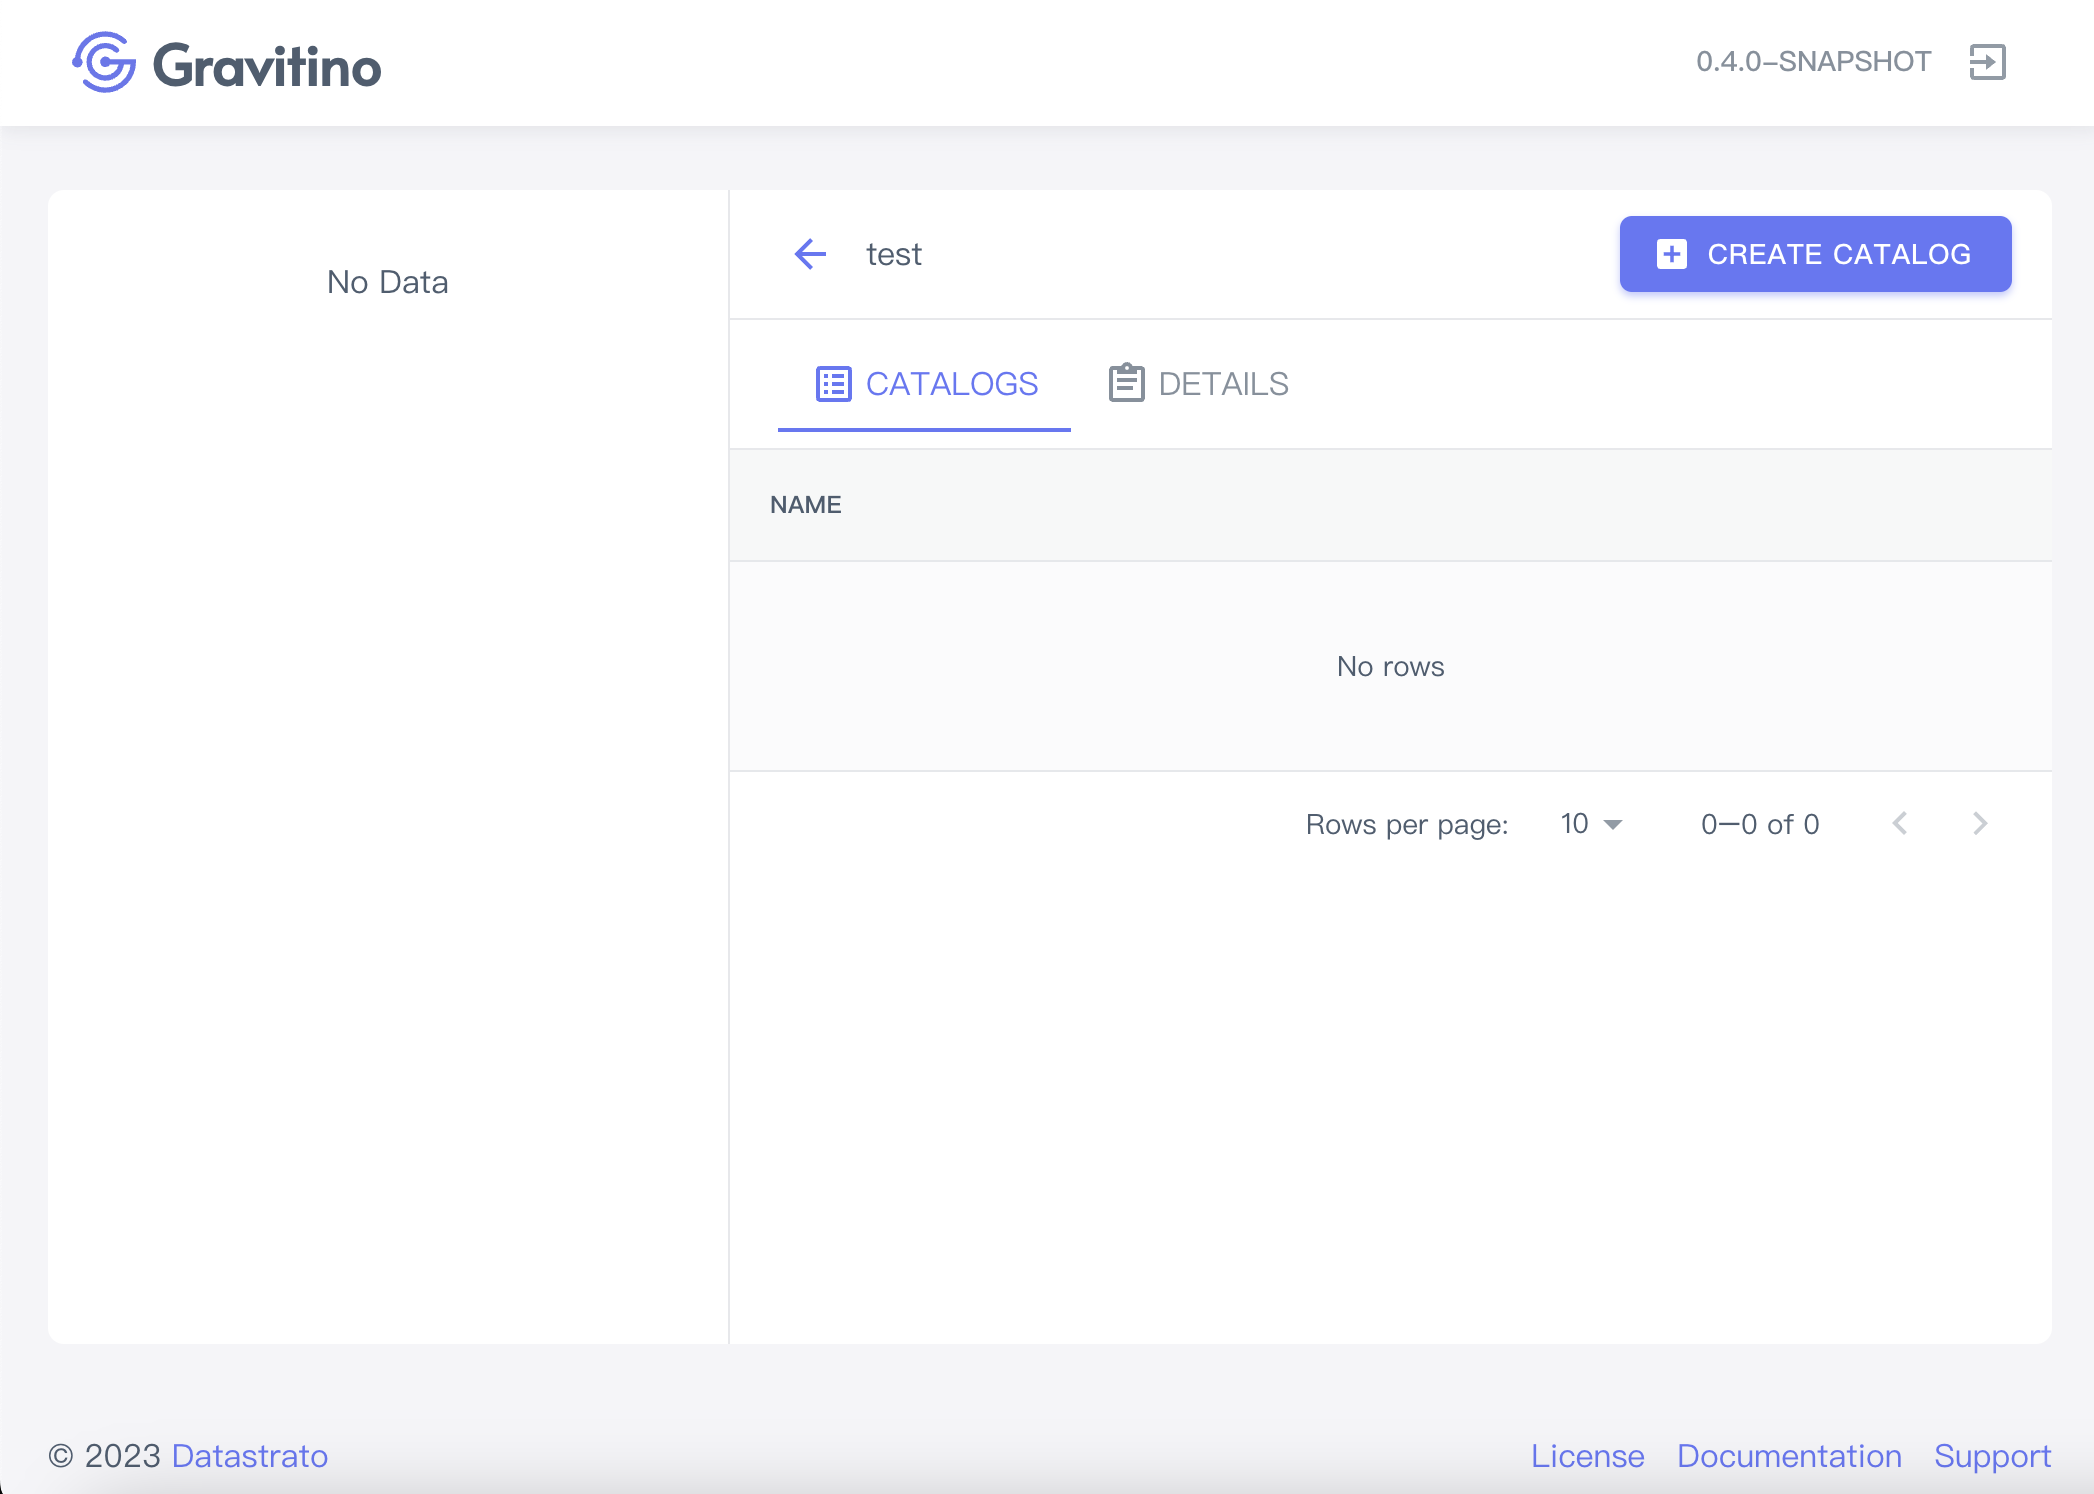
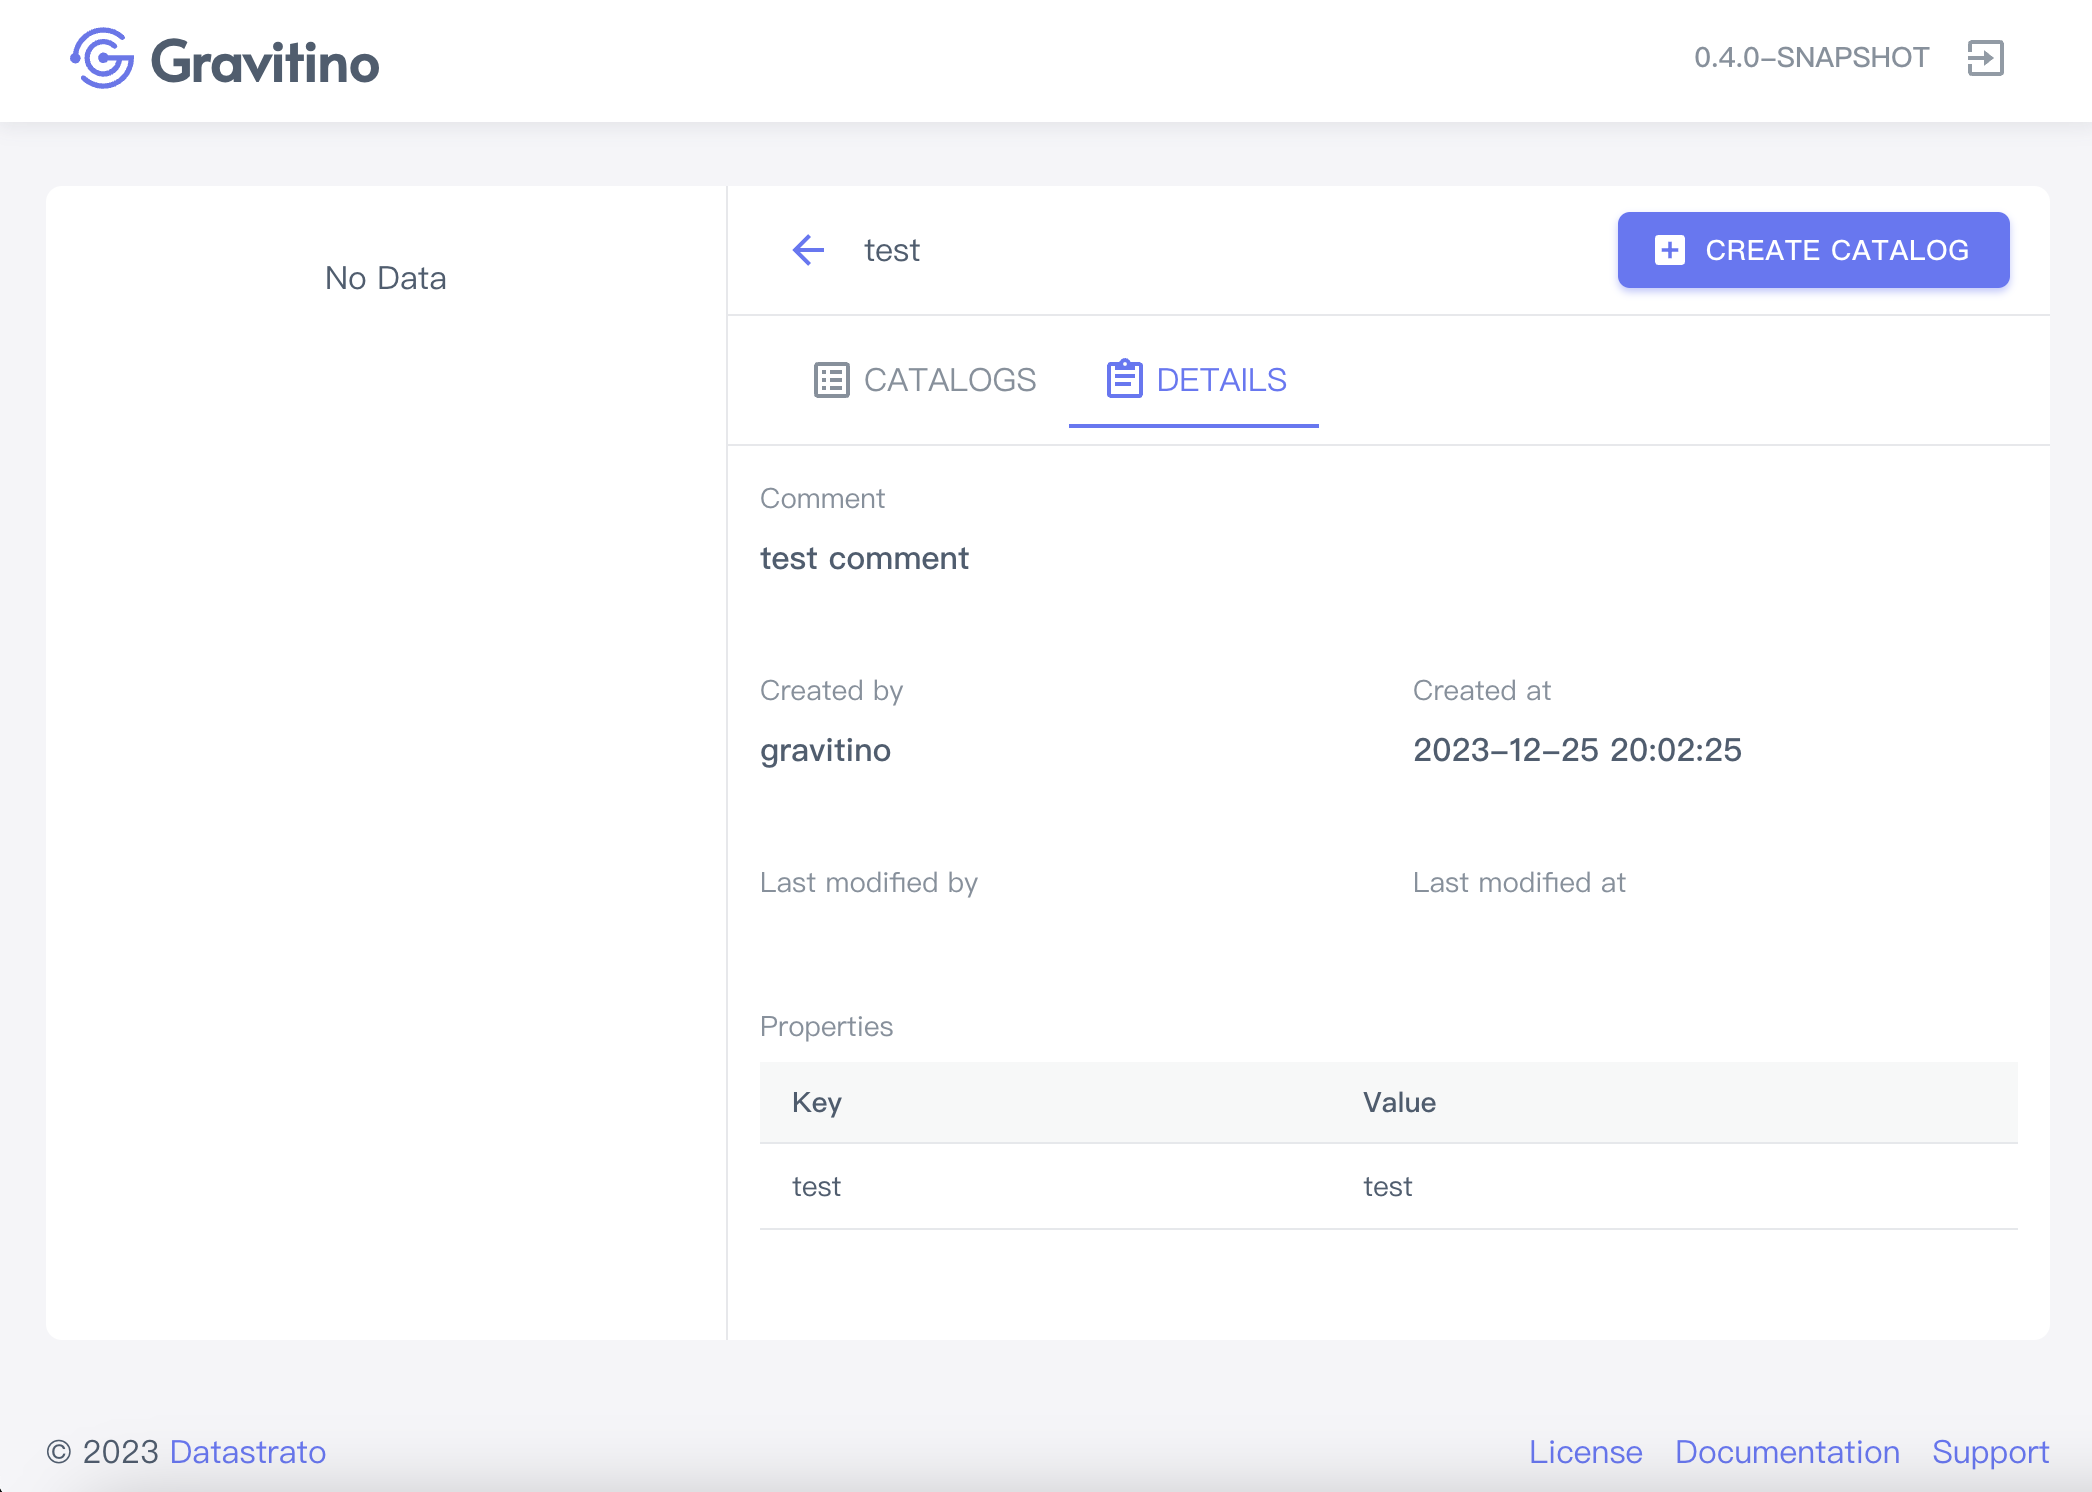
Clicking on the Tab - DETAILS views the details of the catalog on the metalake catalogs page.
Create a catalog
Clicking on the CREATE CATALOG button displays a dialog to create a catalog.
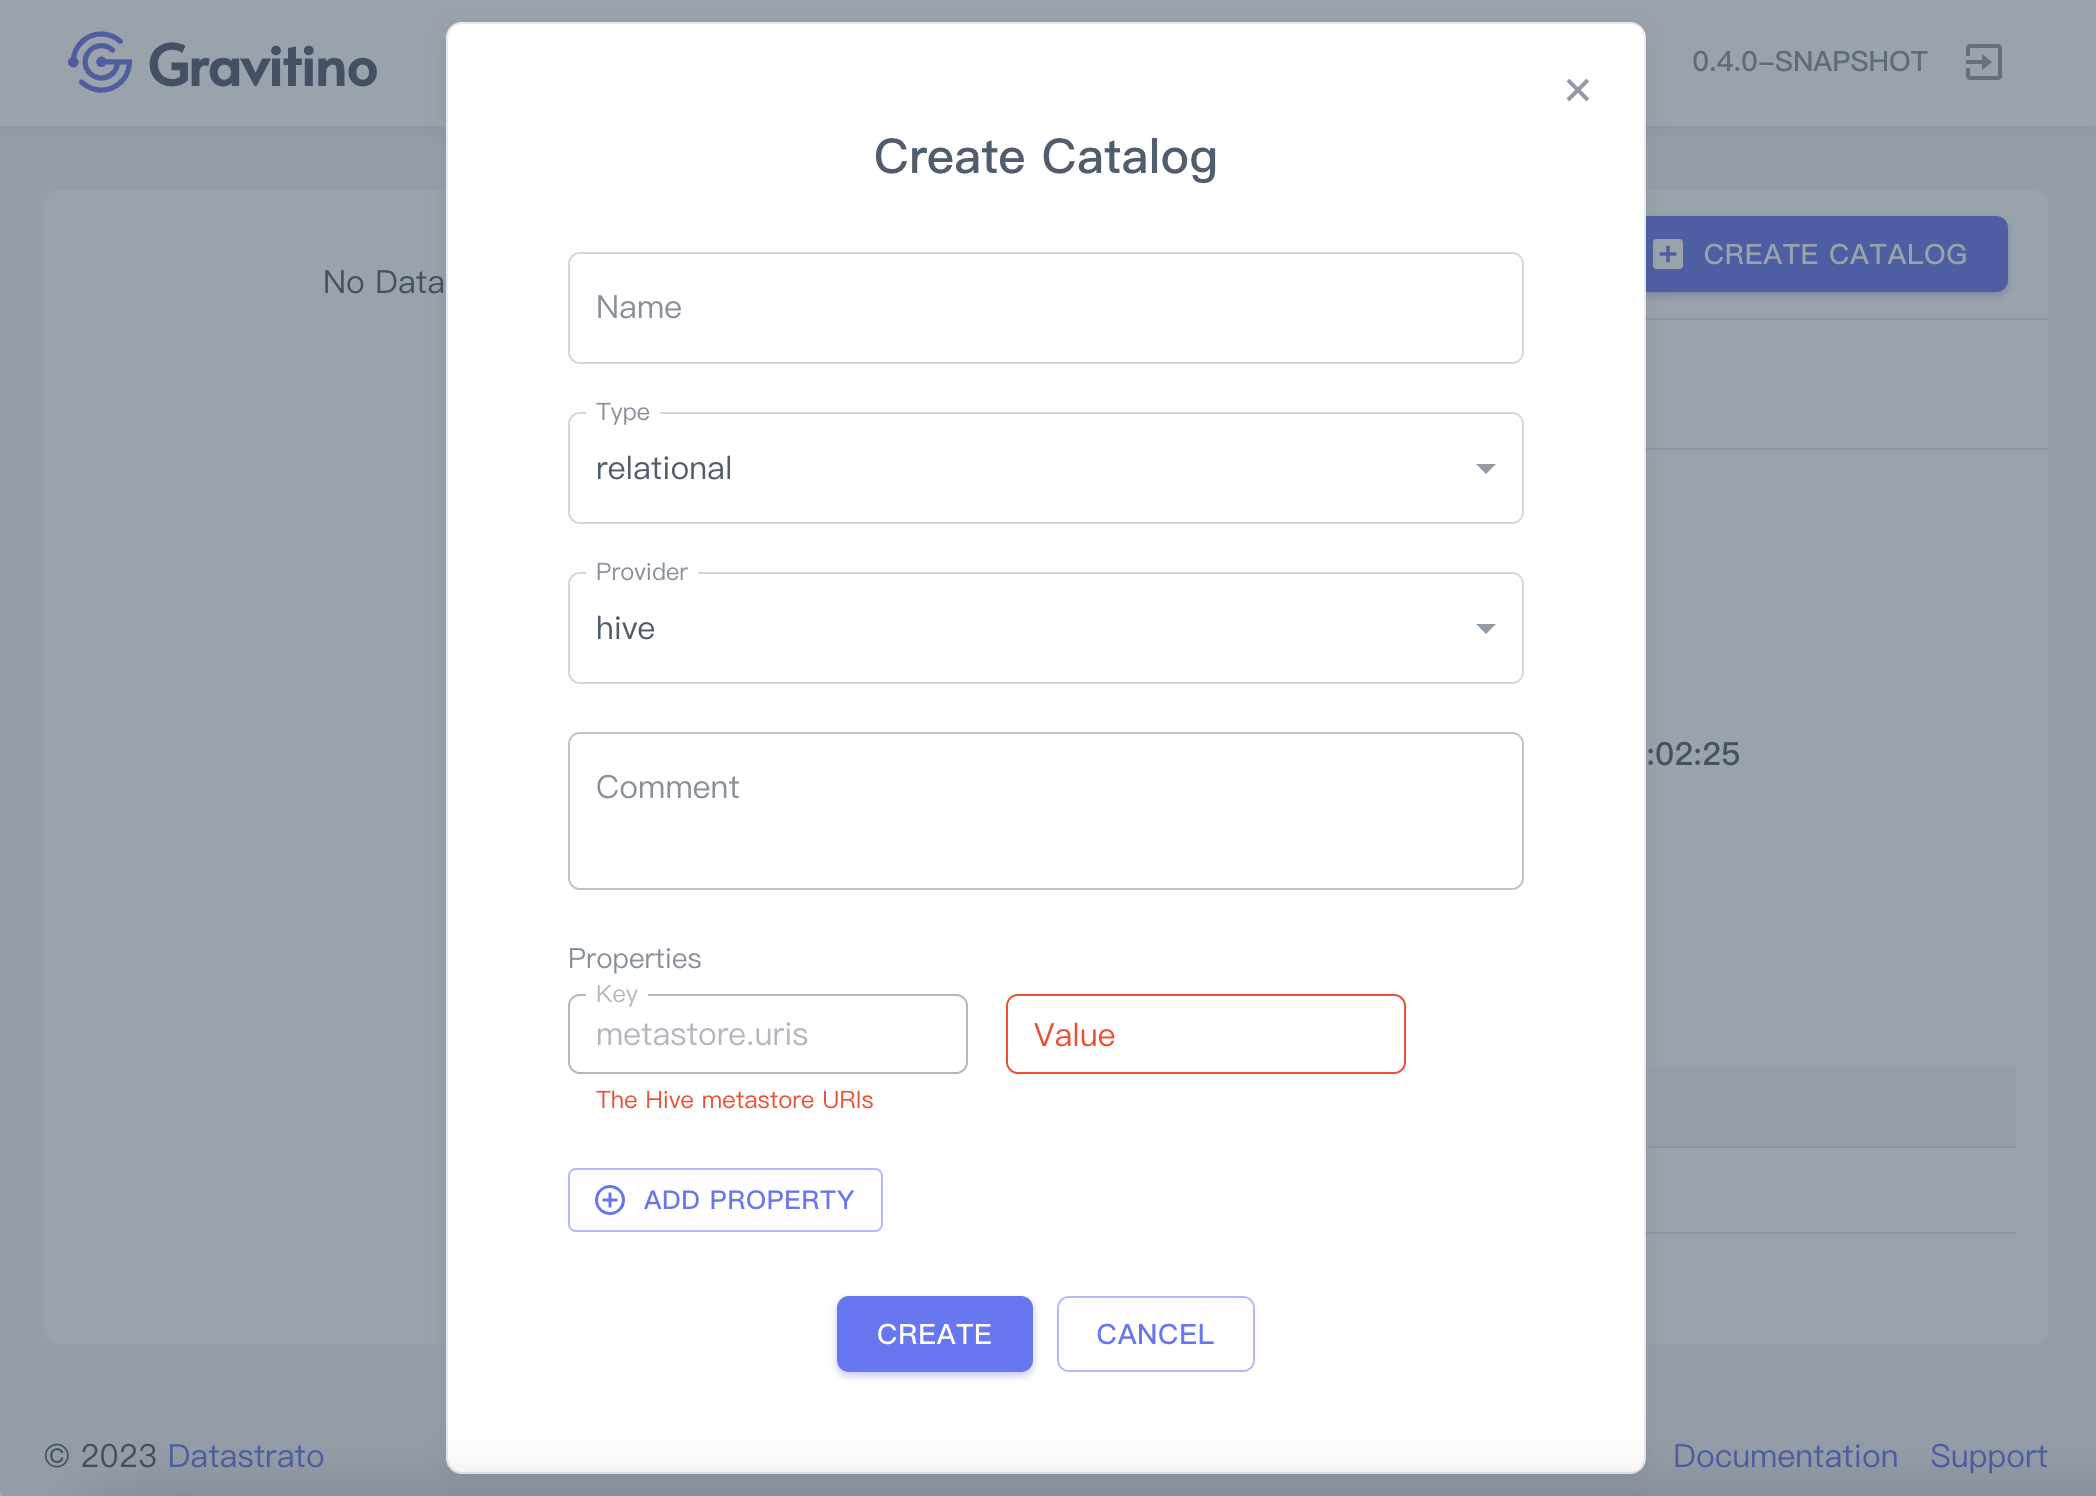
Creating a catalog requires these fields:
- Catalog name(required): the name of the catalog
- Type(required): the default value is
relational - Provider(required):
hive/iceberg/mysql/postgresql - Comment(optional): the comment of this catalog
- Properties(each
providermust fill in the required property fields specifically)
Providers
Required properties in various providers
- Hive
- Iceberg
- MySQL
- PostgreSQL
Follow the Apache Hive catalog document

| Key | Description |
|---|---|
| metastore.uris | The Hive metastore URIs e.g. thrift://127.0.0.1:9083 |
Follow the Lakehouse Iceberg catalog document
the parameter catalog-backend provides two values: hive, and jdbc.
| Key | Description |
|---|---|
| catalog-backend | hive, or jdbc |
hive

| Key | Description |
|---|---|
| uri | Iceberg catalog URI config |
| warehouse | Iceberg catalog warehouse config |
jdbc
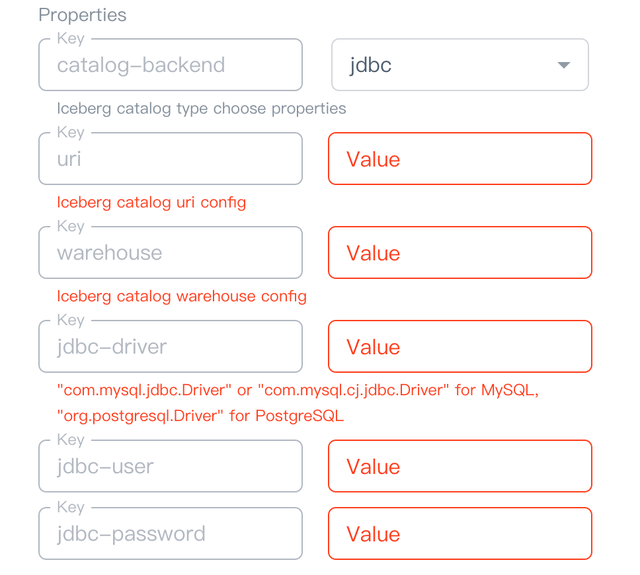
| Key | Description |
|---|---|
| uri | Iceberg catalog URI config |
| warehouse | Iceberg catalog warehouse config |
| jdbc-driver | "com.mysql.jdbc.Driver" or "com.mysql.cj.jdbc.Driver" for MySQL, "org.postgresql.Driver" for PostgreSQL |
| jdbc-user | jdbc username |
| jdbc-password | jdbc password |
Follow the JDBC MySQL catalog document
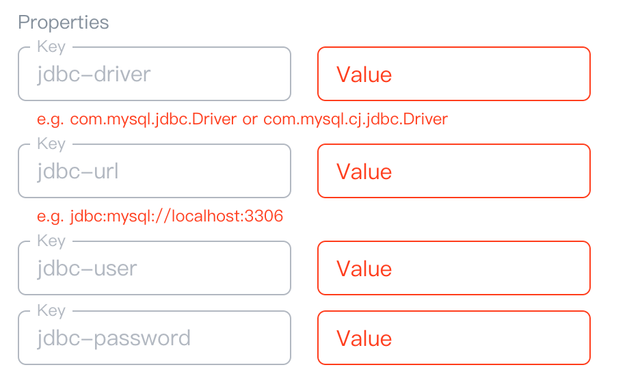
| Key | Description |
|---|---|
| jdbc-driver | JDBC URL for connecting to the database. e.g. com.mysql.jdbc.Driver or com.mysql.cj.jdbc.Driver |
| jdbc-url | e.g. jdbc:mysql://localhost:3306 |
| jdbc-user | The JDBC user name |
| jdbc-password | The JDBC password |
Follow the JDBC PostgreSQL catalog document
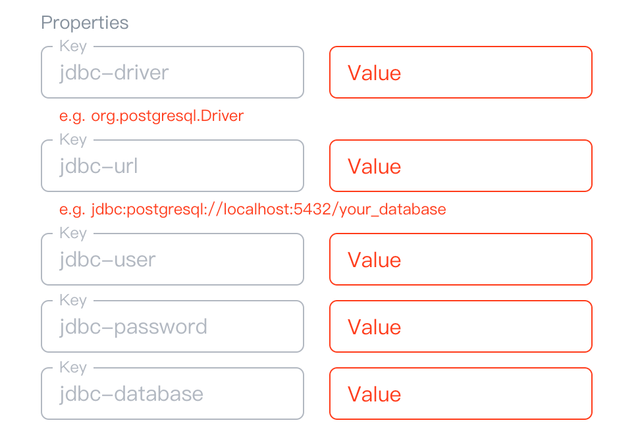
| Key | Description |
|---|---|
| jdbc-driver | e.g. e.g. org.postgresql.Driver |
| jdbc-url | e.g. jdbc:postgresql://localhost:5432/your_database |
| jdbc-user | The JDBC user name |
| jdbc-password | The JDBC password |
| jdbc-database | e.g. pg_database |
After verifying the values of these fields, clicking on the CREATE button creates a catalog.

Clicking on the icon button - ←(left arrow) takes you to the metalake page.
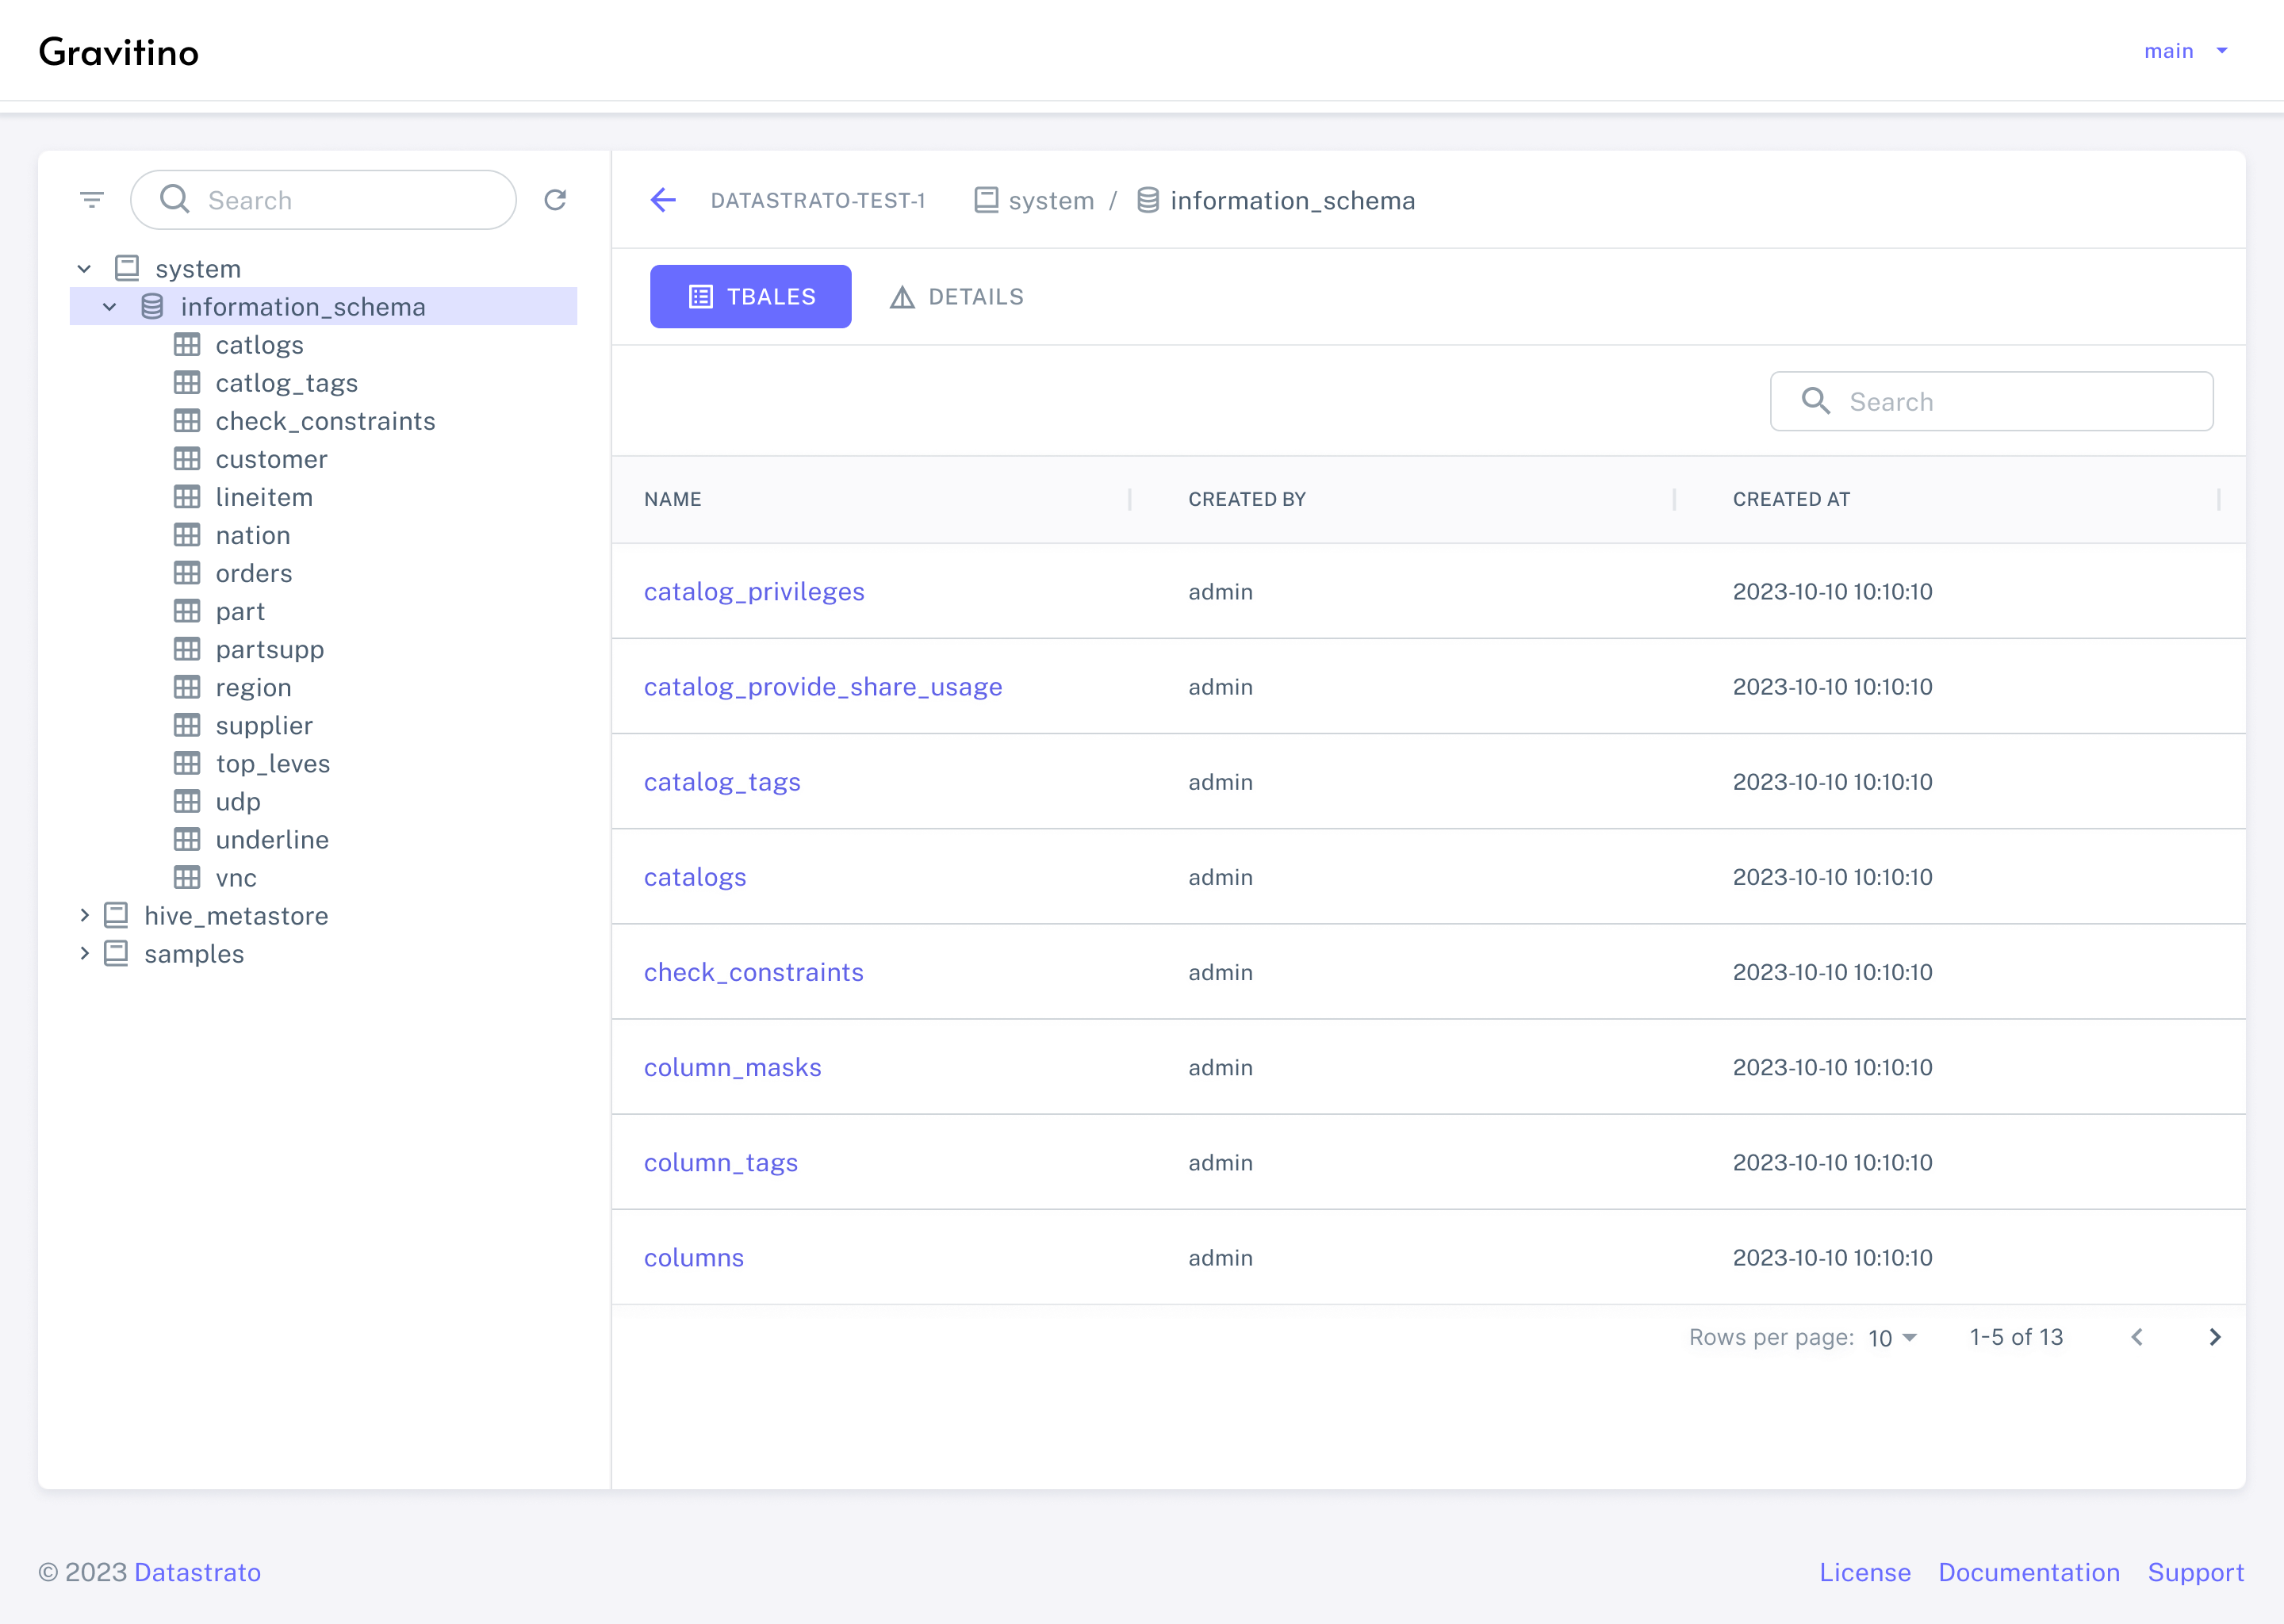
Schema
Under Construction...
- View
- Create
- Edit
- Delete
Design draft preview:
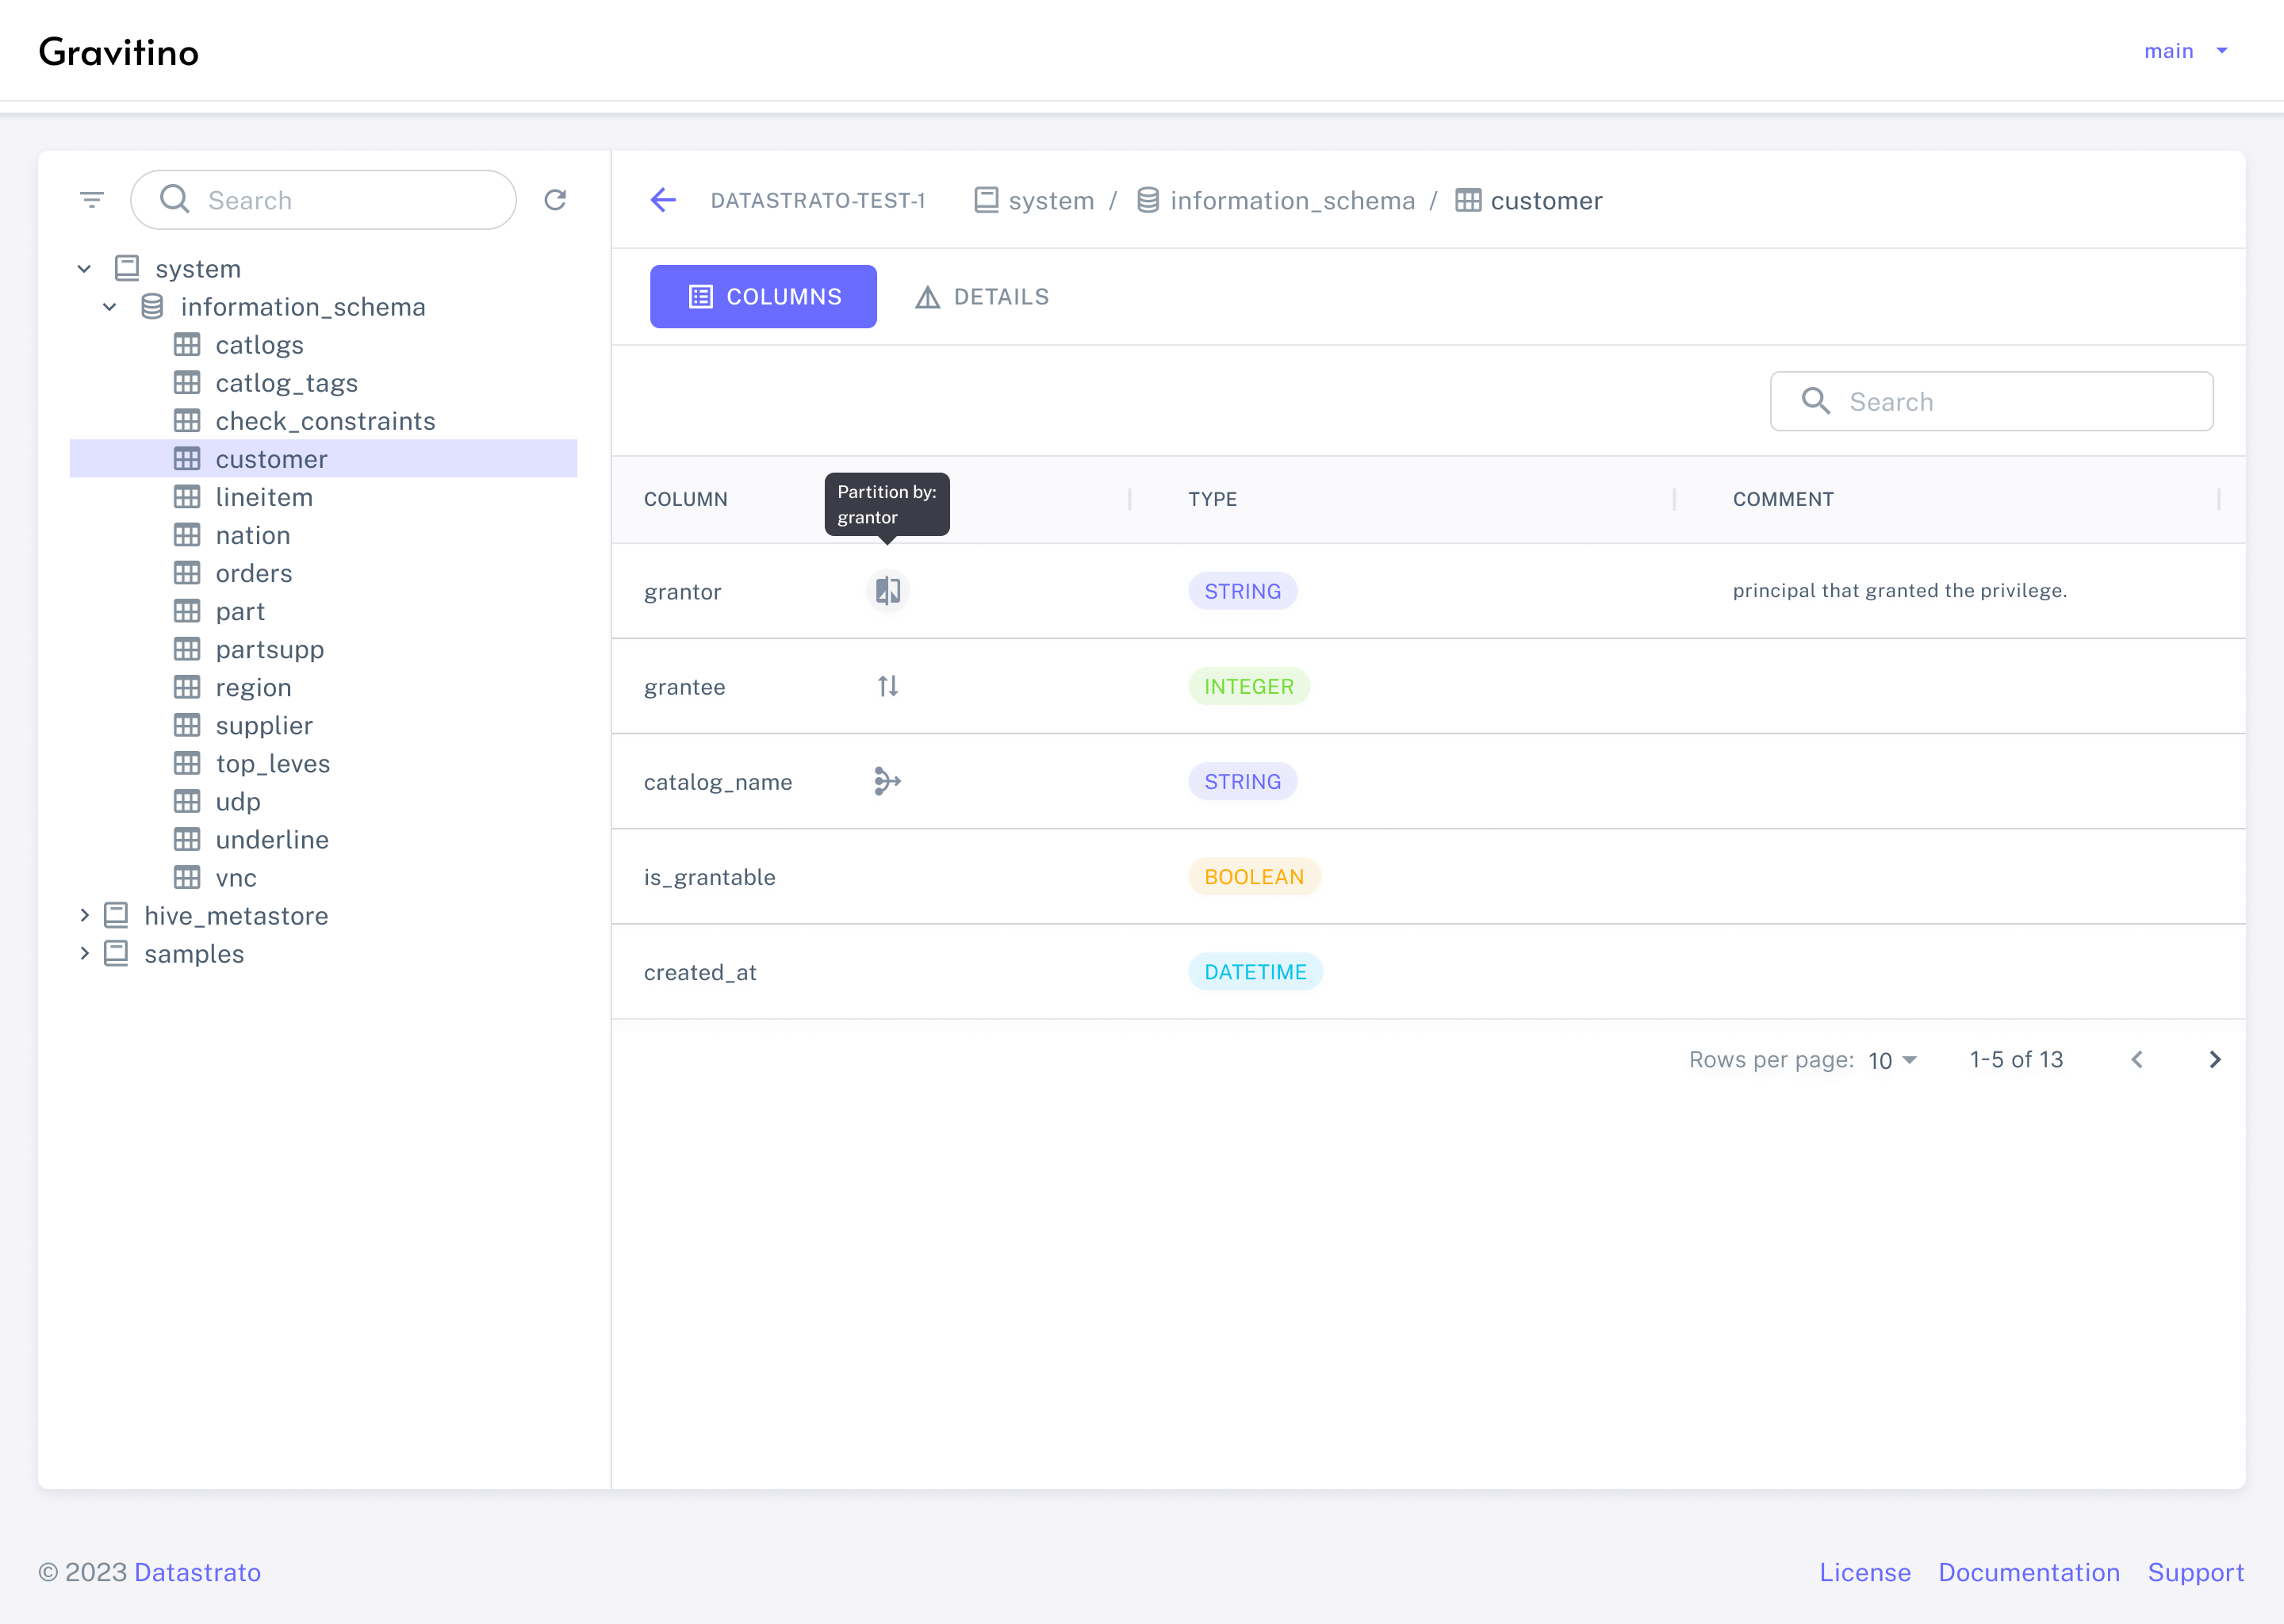
Table
Under Construction...
- View
- Create
- Edit
- Delete
Design draft preview:
Feature capabilities
| Page | Capabilities |
|---|---|
| Metalake | View ✔ / Create ✔ / Edit ✔ / Delete ✔ |
| Catalog | View ✔ / Create ✔ / Edit ✘ / Delete ✘ |
| Schema | View ✔ / Create ✘ / Edit ✘ / Delete ✘ |
| Table | View ✔ / Create ✘ / Edit ✘ / Delete ✘ |